¡Bienvenidos a mi rinconcito en Hive!
Me declaro amante de las recetas a base de yogurt o yogurt griego y si bien se pueden consumir solo, al combinarlos con otros sabores podemos darle un giro interesante. En mi opinión, el yogurt es un alimento sumamente noble, pues con él se pueden preparar un sin fin de platillos como sopas, cremas, bebidas, tortas, postres entre otros y ya que el algoritmo de Instagram sabe que me encantan este tipo de recetas, hace poco me mostró una receta de bolitas de yogurt griego que hice y me resultaron irresistibles, así que quise compartirla con ustedes.
Ahora bien, investigando un poco sobre esta receta, descubrí que realmente es un tipo de queso que se hace con el yogurt griego y que en países como Turquía y el medio oriente es conocido como ”Labneh” que significa Queso de yogurt, el cual es muy parecido al queso crema, pero en su versión más saludable ya que es más bajo en calorías y grasas.
Ahora, sin más demoras, el paso a paso de cómo hacer Queso de yogurt Griego o “Labneh”.
Vas a necesitar los siguientes ingredientes:
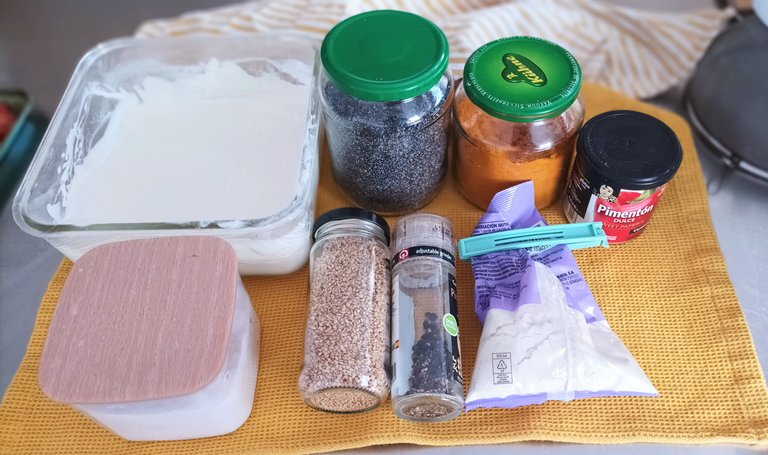
• 800 gr de yogurt griego. Aquí te muestro cómo hacerlo.
• 1 taza de aceite de oliva.
Especias para el 1er sabor:
• 4 cditas de orégano
• 2 cditas de semillas de ajonjolí tostadas.
• ½ cdita de ajo en polvo.
• 1 cdita de sal.
Especias para el 2do sabor:
• 1 cdita de pimentón ahumado dulce.
• 1 cdita de cúrcuma.
• 1 cdita de semillas de amapola.
• ½ cdita de sal
• Una pizquita de pimienta.
Adicional:

• Un recipiente.
• Un filtro de tela.
• Un colador.
• Un frasco reciclado.
Preparación:
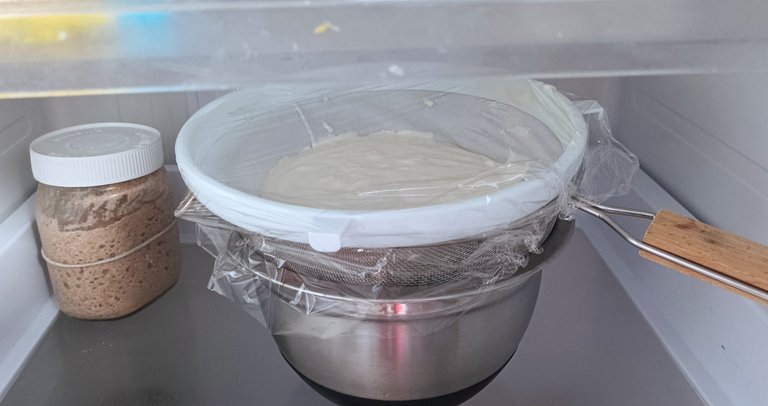
Agregar el yogurt griego en el filtro, cubrir muy bien y llevar al refrigerador para que bote todo el suero durante 24 a 48 horas.

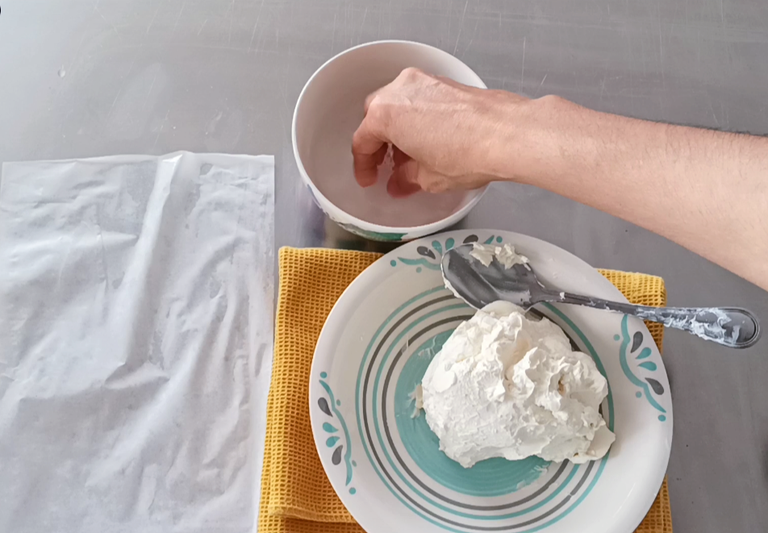
Pasado ese tiempo, verás que el yogurt ha tomado una consistencia muy firme parecido a la del queso crema. Te recomiendo, exprimir un poco para sacar el suero que queda, pues mientras más duro esté el yogurt, podrás manipularlo mejor.

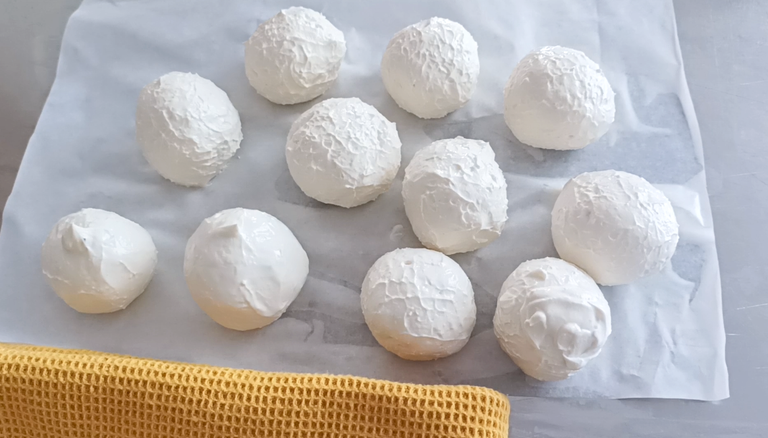
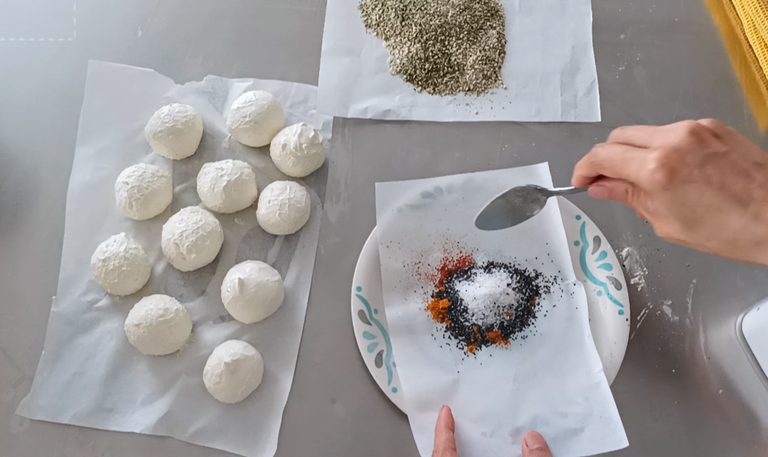
Luego, pasar el yogurt griego a un plato y hacer bolitas con las manos ligeramente humedecidas para que no se te peguen. Colocar las bolitas sobre un papel de cocina húmedo. Cuando hayas terminado, reserva.
Por otro lado, preparamos el primer sabor con el orégano, las semillas de ajonjolí, el ajo y la sal. Integrar muy bien estas especias. Repetir el proceso con el segundo sabor.
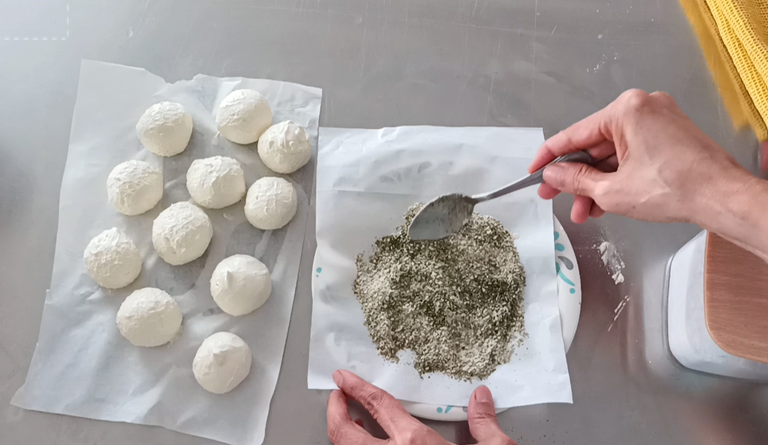
Hecho ésto, cubrir las bolitas con las mezclas que hicimos anteriormente y luego llevarlas a un frasco con el aceite de oliva. Por cierto, este aceite se puede reutilizar en las ensaladas o en cualquier otra comida.*


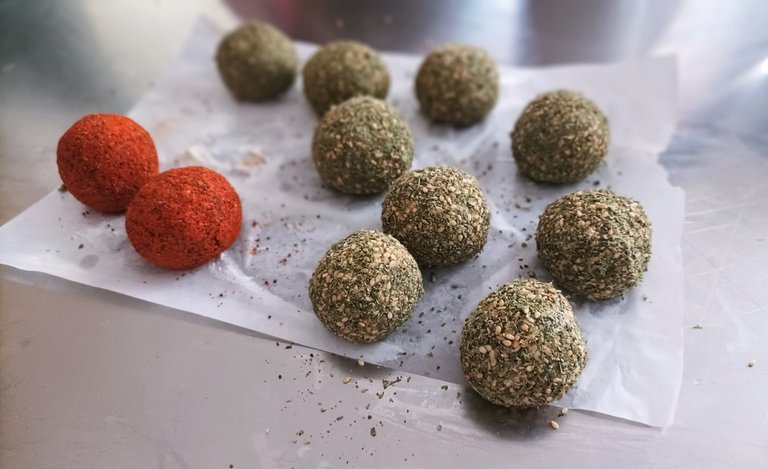
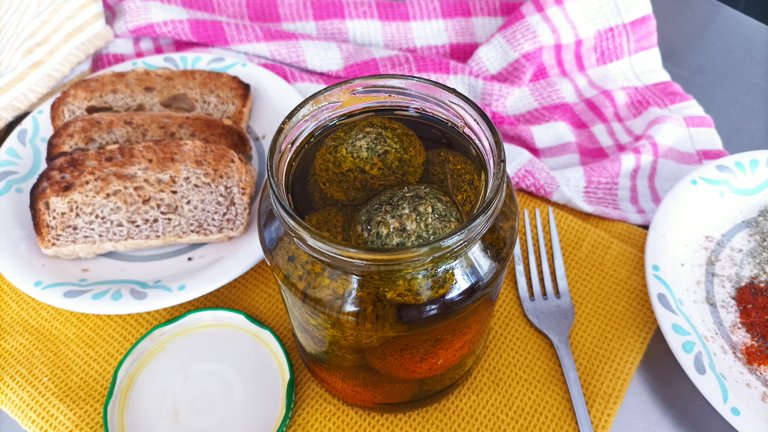
Y este es el resultado de este exquisito Queso de Yogurt Griego que puedes saborizar con las especias que más te gusten.
Ahora les dejo con este video cortito donde hago la degustación y además podrán ver un pequeño cameo de un invitado imprevisto.
Está es la segunda vez que preparo este Queso de Yogurt Griego y la verdad es que estoy muy contenta de haber conseguido esta receta tan maravillosa y que estoy segura que te va a encantar, pues es una forma más saludable de comer queso untable casero.
Para despedirme quiero dejarlos con una reflexión que leí hace poco:
Comer con calma, respirar profundo y nutrirnos de pensamientos ligeros y amorosos es tan importante como la comida que elegimos. Escucha a tu estómago, porque muchas veces sabe lo que tu mente aún no ha entendido.
Gracias por ser una grata compañía en mi cocina y por el apoyo.
¡Tu amiga, Zuuu!
ENGLISH

Welcome to my little corner on Hive!
I declare myself a lover of recipes based on yogurt or Greek yogurt and although they can be consumed alone, by combining them with other flavors we can give them an interesting twist. In my opinion, yogurt is an extremely noble food, because with it you can prepare endless dishes such as soups, creams, drinks, cakes, desserts among others and since the Instagram algorithm knows that I love this kind of recipes, it recently showed me a recipe for Greek yogurt balls that I made and I found them irresistible, so I wanted to share it with you.
Now, doing a little research on this recipe, I discovered that it is actually a type of cheese that is made with Greek yogurt and that in countries like Turkey and the Middle East is known as "Labneh” which means Yogurt Cheese, which is very similar to cream cheese, but in its healthier version as it is lower in calories and fat.
Now, without further delay, the step by step of how to make Greek yogurt cheese or “Labneh ”.
You will need the following ingredients:
• 800 gr Greek yogurt. Here's how to do it.
• 1 cup of olive oil.
Spices for the 1st flavor:
• 4 teaspoons oregano.
• 2 teaspoons toasted sesame seeds.
• ½ teaspoon garlic powder.
• 1 teaspoon salt.
Spices for 2nd flavor:
• 1 tsp sweet smoked paprika.
• 1 teaspoon turmeric.
• 1 teaspoon poppy seeds.
• ½ teaspoon salt.
• Pinch of pepper.
Additional:
• One bowl.
• A cloth strainer.
• A strainer.
• Recycled jar.
Preparation:
Add the Greek yogurt to the filter, cover tightly and place in the refrigerator to let all the whey run out for 24 to 48 hours.
After that time, you will see that the yogurt has taken a very firm consistency similar to cream cheese. I recommend squeezing a little to remove the remaining whey, because the harder the yogurt is, the better you will be able to handle it.
Then, transfer the Greek yogurt to a plate and make small balls with slightly moistened hands so they don't stick. Place the balls on a damp kitchen towel. When you have finished, set aside.
On the other hand, prepare the first flavor with the oregano, sesame seeds, garlic and salt. Integrate these spices very well. Repeat the process with the second flavor.
Once this is done, cover the balls with the mixtures we did before and then take them to a jar with the olive oil. **By the way, this oil can be reused in salads or in any other food.
And this is the result of this exquisite Greek Yogurt Cheese that you can flavor with the spices you like the most. you like.
Now I leave you with this short video where I do the tasting and you can also see a little cameo of an unexpected guest***.
This is the second time I prepare this Greek Yogurt Cheese and the truth is that I am very happy to have gotten this wonderful recipe and I am sure you will love it, because it is a healthier way to eat homemade spreadable cheese.
To say goodbye I want to leave you with a reflection I read recently:
Eating calmly, breathing deeply and nourishing ourselves with light and loving thoughts is as important as the food we choose. Listen to your stomach, because many times it knows what your mind has not yet understood.
Thank you for being a pleasant company in my kitchen and for the support!
Your friend, Zuuu!

All photos and videos in this post were taken with my Xiaomi Redmi 10 cell phone.
Resources: DeepL Translator, Capcut and Gifty (Free Versions).
Posted Using INLEO
