ENGLISH
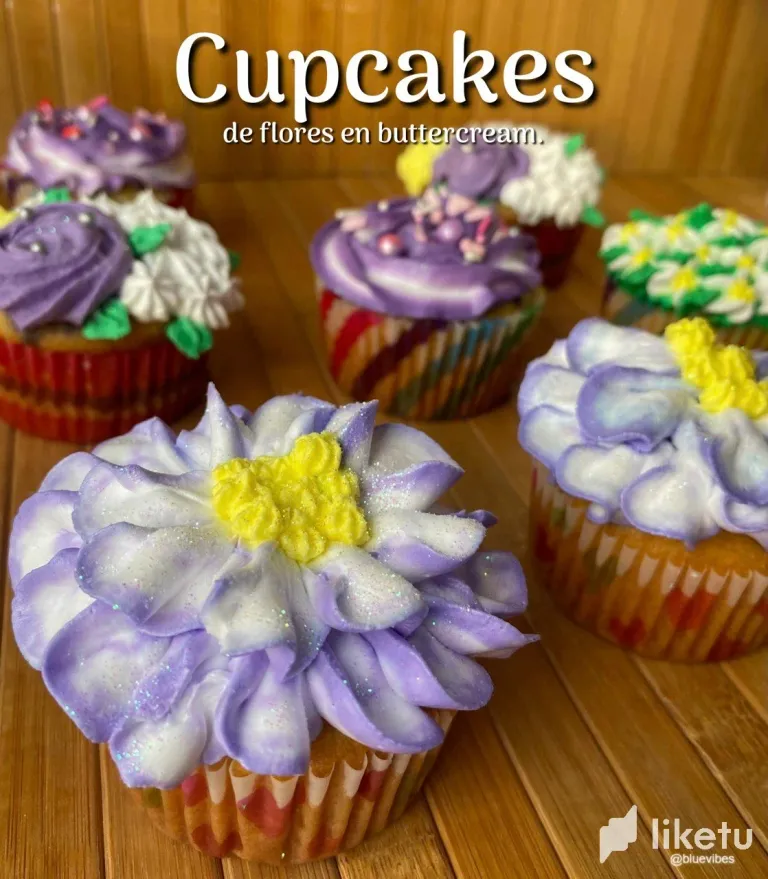
Hello friends, happy day! I hope you are feeling great and that you are having a great weekend. For my part, I feel a little lost and this weekend I have had a lot of work with my mother, thank God, we have had a lot of orders for Mother's Day so rest has not been an option but of course, we are super grateful. I tell you that for this celebration of Mother's Day we armed ourselves with some combos among those cakes of different flavors and presentations, brownies, desserts and cupcakes decorated in a floral way that are the ones I come to share with you today. In this team with my mother, each one has an assigned task, that is to say, she is in charge of cooking and I am in charge of decorating the cakes and although I am still in constant learning, I enjoy every process. Without further ado, here I will share with you one of the many ways (my favorite) that I used to decorate these Cupcakes.
Procedure
Step 1️⃣
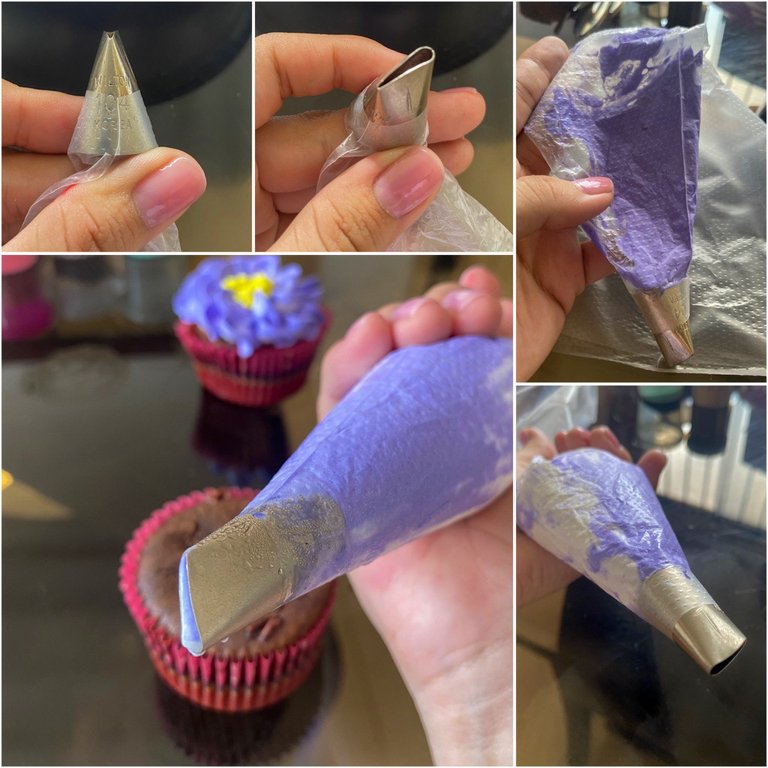
The first thing was to select the nozzle, in this case I used the Wilton #104 that if you can see is curved type with one part more open than the other, to give this effect of petals with edge what I did was to add the buttercream in purple tone just in the direction of the smallest part and then proceeded to completely fill the sleeve with white cream.
Step 2️⃣
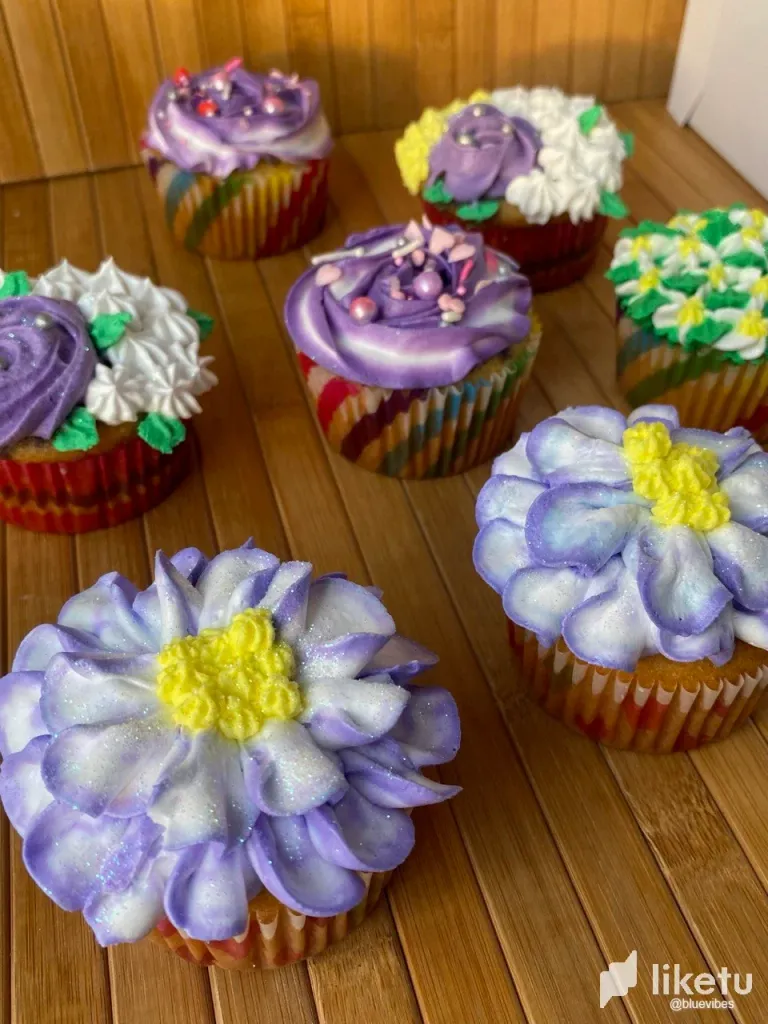
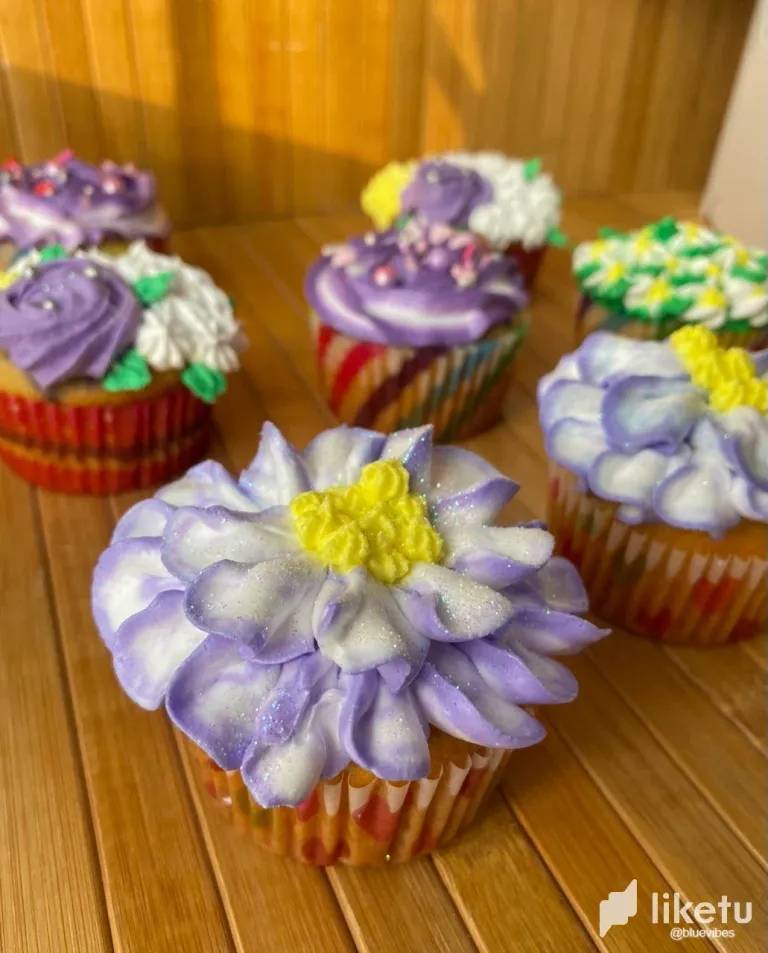
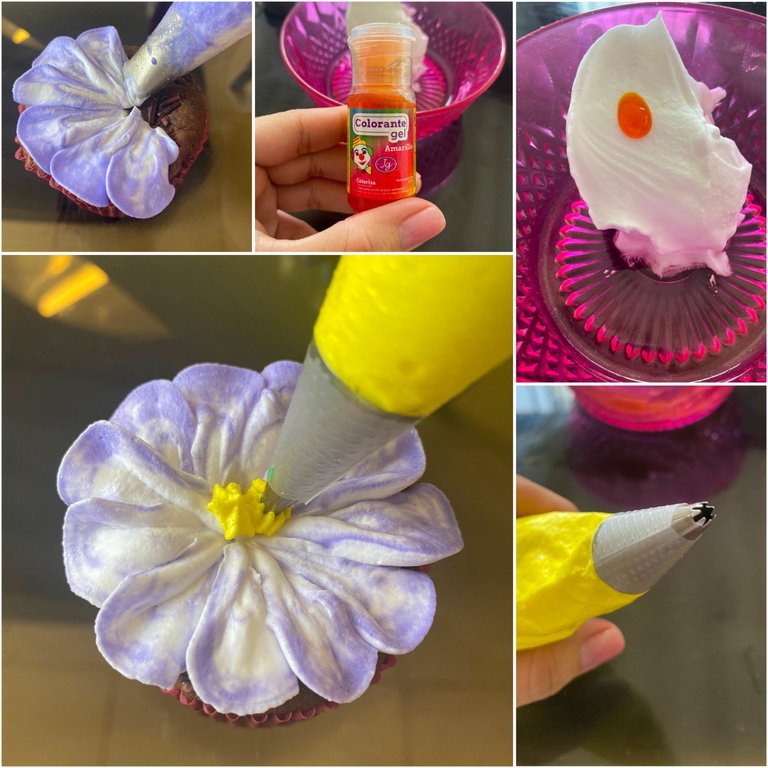
Once the previous step was ready, I proceeded to create my petals, for this I worked with the smaller part outwards and the larger part inwards, from the center of the cupcake I added the cream and gave it a slight movement upwards and then downwards to form the petal, so repeatedly until my flower was ready. For the center part I used a little cream, yellow coloring and with a much smaller nozzle and tips I made some small dots in the center of the flower.
Step 3️⃣
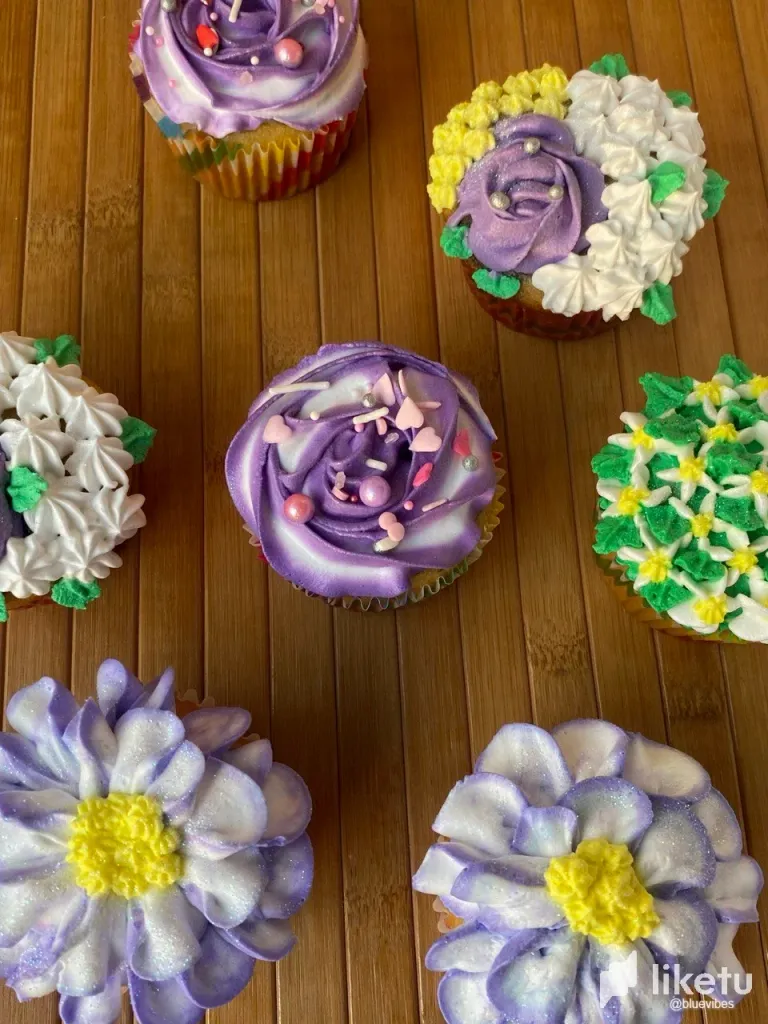
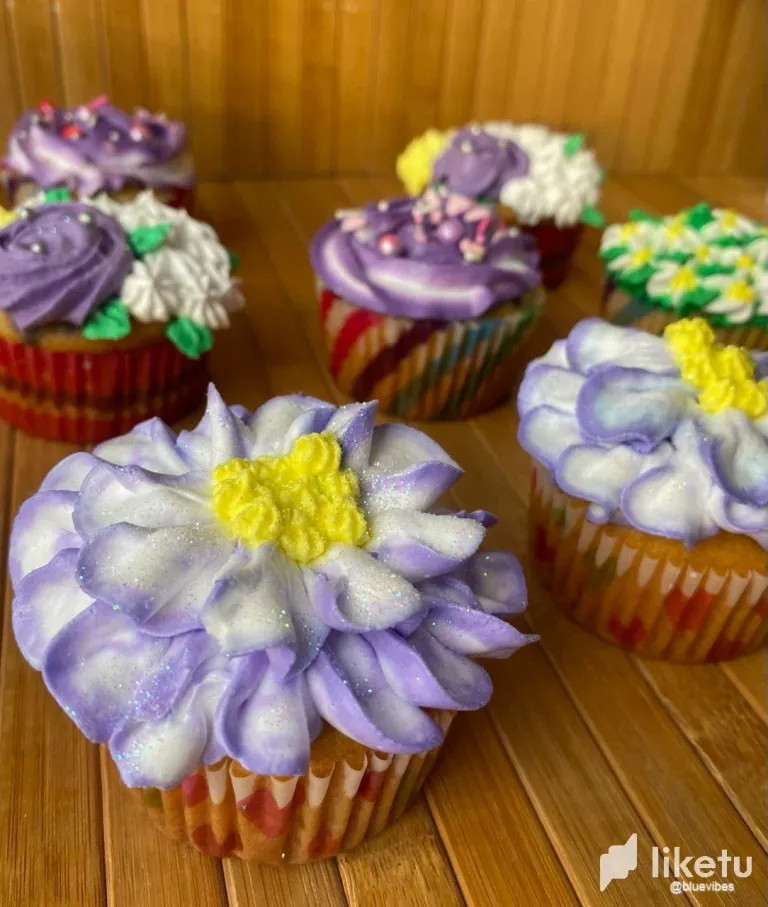
There were some flowers that I decided to create with double the number of petals, as there were others that I left single-story and simpler, at the end I added a little glitter in the murano tone to give it the touch.
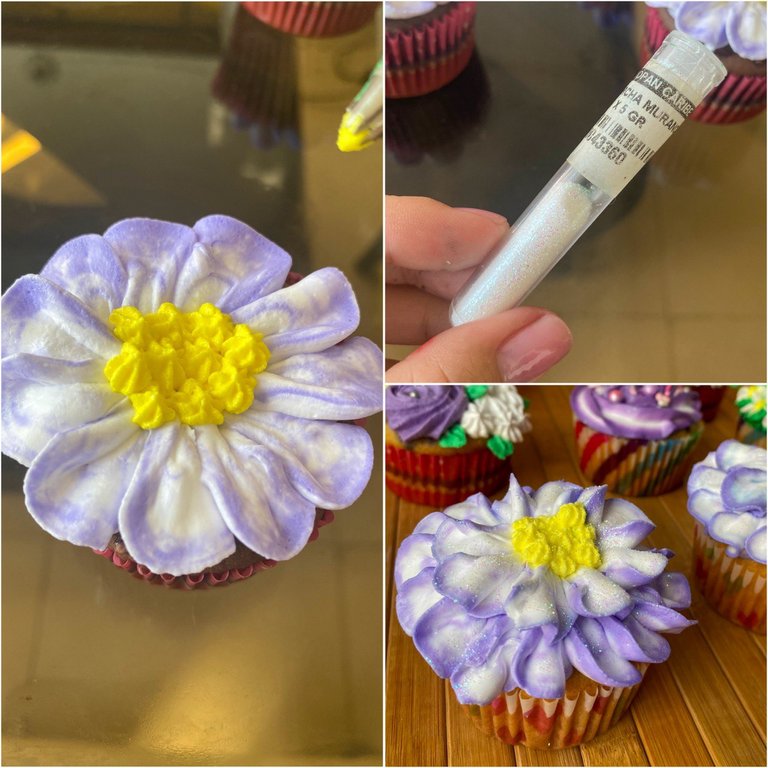
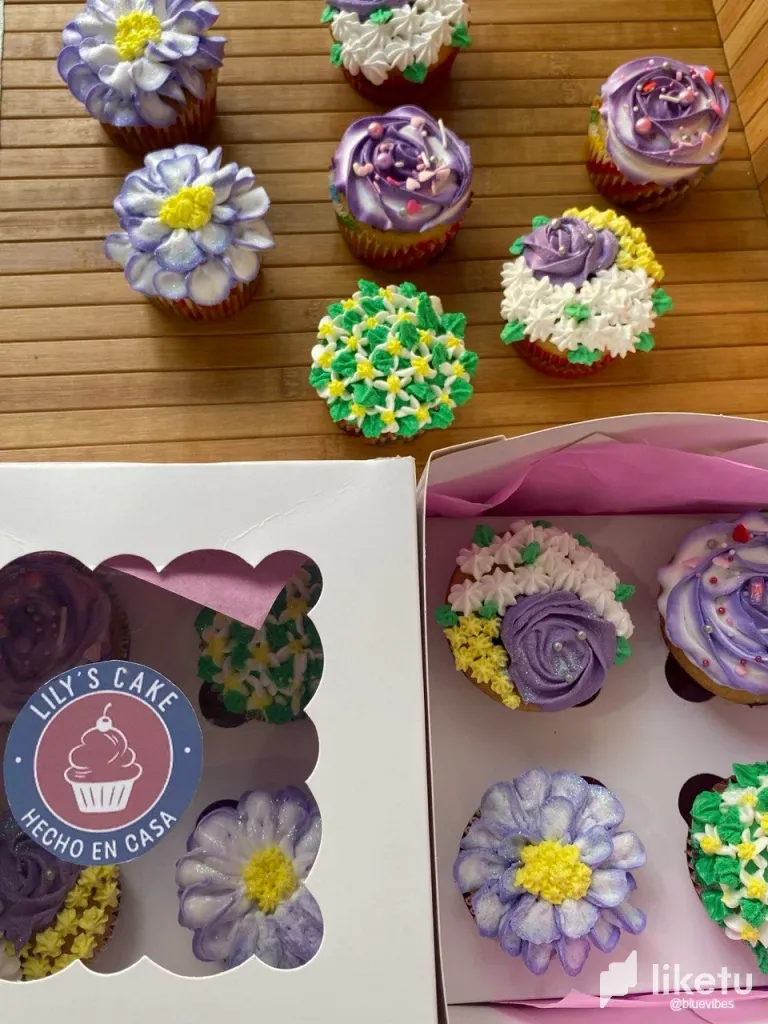
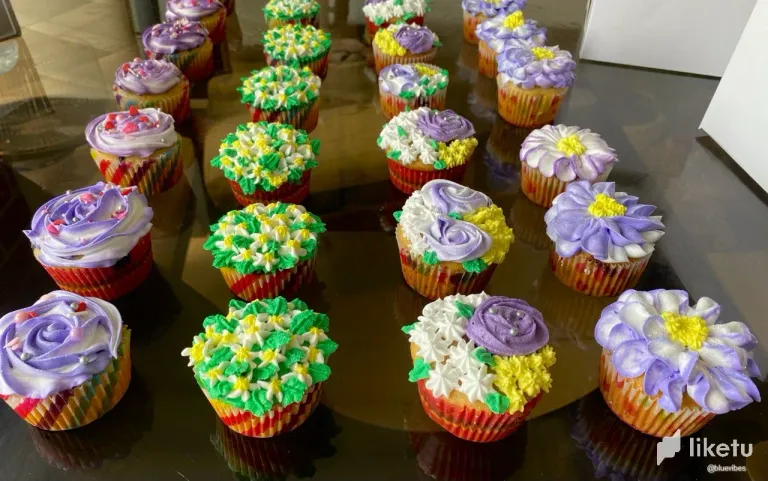
And well, this is how these cute cupcakes turned out, as the presentation was in a little box x4, I made each one with a different motif but they worked together and looked nice. It was a long and detailed work but I loved the result, I hope you do too. Without further ado, thanks for reading to the end friends, I hope you liked the mini tutorial. A hug ❤️

ESPAÑOL
Hola amigos, feliz día! Espero que se encuentren súper bien y que estén pasando un excelente fin de semana. Por mi parte, me siento un poco perdida y es que este fin de semana he tenido bastante trabajo junto a mi madre gracias a Dios, nos han salido bastante pedidos para el día de las madres por lo que el descanso no ha sido una opción pero claro, estamos súper agradecidas. Les cuento que para esta celebración del día de la madre nos armamos con algunos combos entre esos tortas de diferentes sabores y presentaciones, brownies, postres y cupcakes decorados de manera floral que son los que les vengo a compartir el día de hoy. En este equipo con mi madre cada una tiene una tarea asignada, es decir, ella se encarga de cocinar y yo de decorar las tortas y aunque sigo en constante aprendizaje, me gozo cada proceso. Sin más, por aquí les compartiré una de las tantas formas (mi favorita) que utilicé para decorar estos Cupcakes.
Procedimiento
Paso 1️⃣
Lo primero fue seleccionar la boquilla, en este caso utilicé la de Wilton #104 que si se pueden dar cuenta es tipo curveada con una parte más abierta que la otra, para darle este efecto de los petalos con borde lo que hice fue añadir la buttercream en tono morado justo en la dirección de la parte más pequeña y luego procedí a rellenar completamente la manga con crema blanca.
Paso 2️⃣
Una vez el paso anterior listo, procedí a crear mis pétalos, para esto trabajé con la parte más pequeña hacía afuera y con la más grande hacía adentro, desde el centro del cupcake añadía la crema y le daba un ligero movimiento hacía arriba y seguidamente hacía abajo para formar el pétalo, así repetidamente hasta que mi flor estuviera lista. Para la parte del centro use un poco de crema, colorante amarillo y con una boquilla mucho más pequeña y en puntas hice unos pequeños puntos en el centro de la flor.
Paso 3️⃣
Hubo algunas flores que decidí crearlas con el doble de pétalos, como hubo otras que deje de un solo piso y más sencillas, al final le añadí un poco de purpurina en el tono murano para darle el toque.
Y bueno, de esta manera quedaron estos lindos cupcakes, como la presentación era en una cajita x4 cada uno lo hice de un motivo diferente pero que trabajaran en conjunto y se viera lindo. Fue un trabajo algo largo y detallado pero me encantó sin duda el resultado, espero que a ustedes también. Sin más, gracias por leer hasta el final amigos, espero les haya gustado el mini tutorial. Un abrazo ❤️
Separador de texto creado por | Text separator
Texto traducido en | Text translated in: Deepl
Imagenes tomadas por mi | Images taken by me
For the best experience view this post on Liketu