Preparando Yogurt Griego
Saludos a todos los miembros de esta maravillosa comunidad, donde los olores y sabores se convierten en palabras y viceversa, donde los saberes se fusionan con el gusto por la buena comida y nuestra cocina se transforma en el centro de nuestra creatividad e imaginación.
Me alegra mucho compartir esta receta de Yogurt Griego, no solo para mostrar el paso a paso (sumamente sencillo), sino también para motivar a las personas que no se han atrevido a prepararlo porque les puede estar pasando lo mismo que a mí, no lo intentaba por no sincerar la receta y por no tener la confianza de obtener buenos resultados.
Así, que sin más preámbulos, como siempre, manos la cocina:

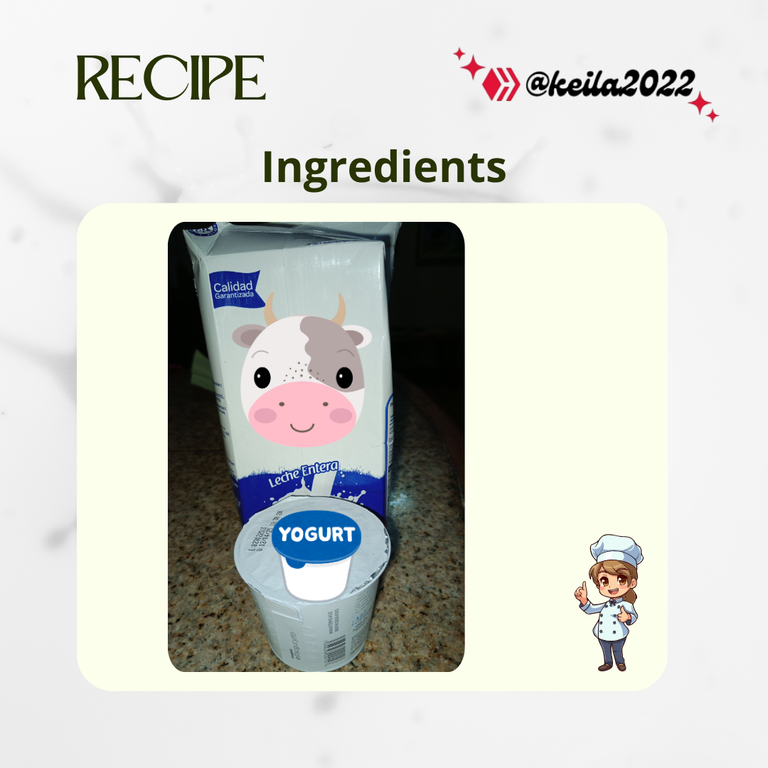
Ingredientes:
150g de yogurt firme natural.
2 litros leche pasteurizada completa.

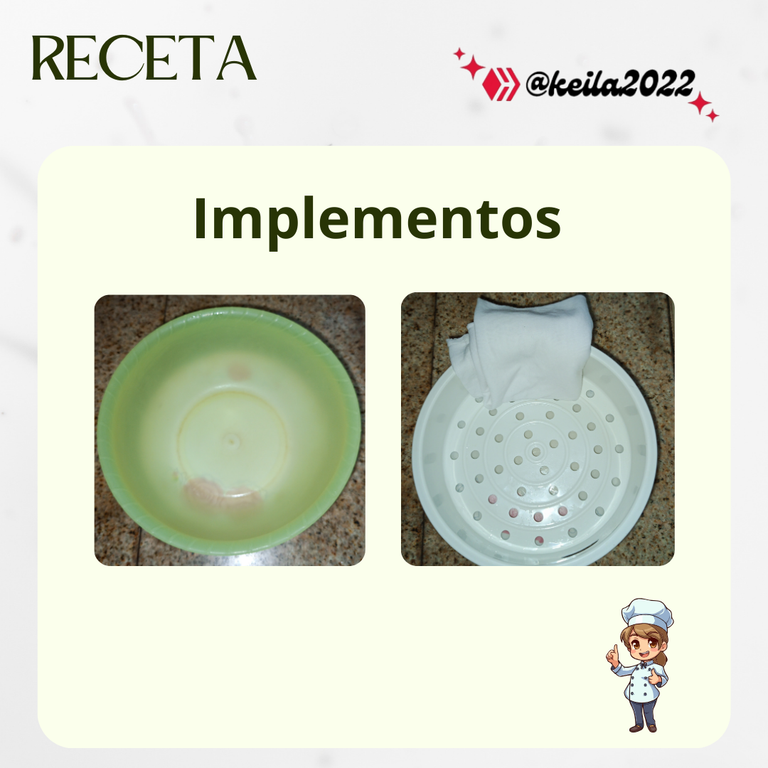
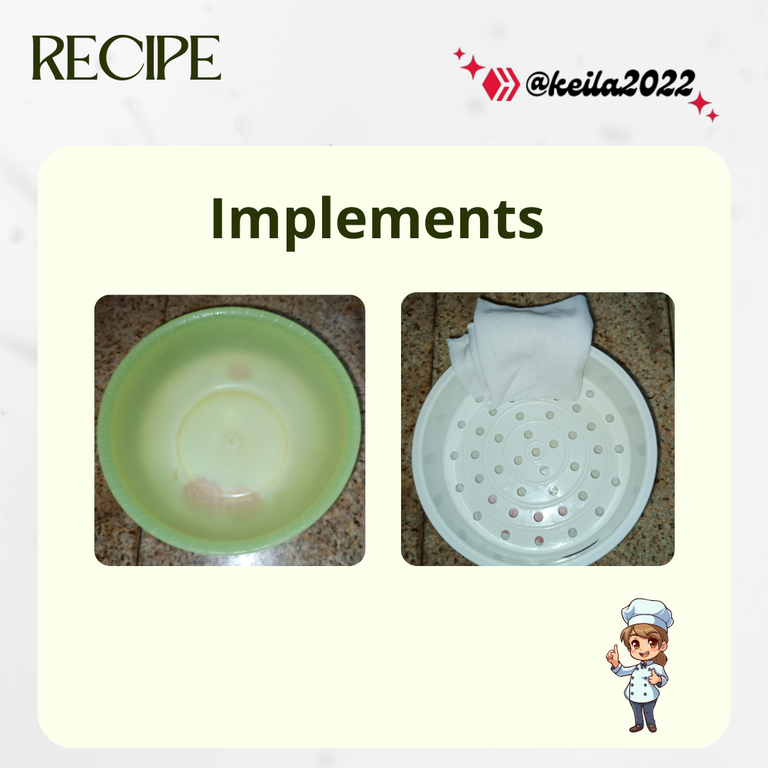
Implementos.
Un trozo de tela (esterilizado con agua caliente).
Una taza mediana.
Un colador grande o filtro.
Procedimiento:
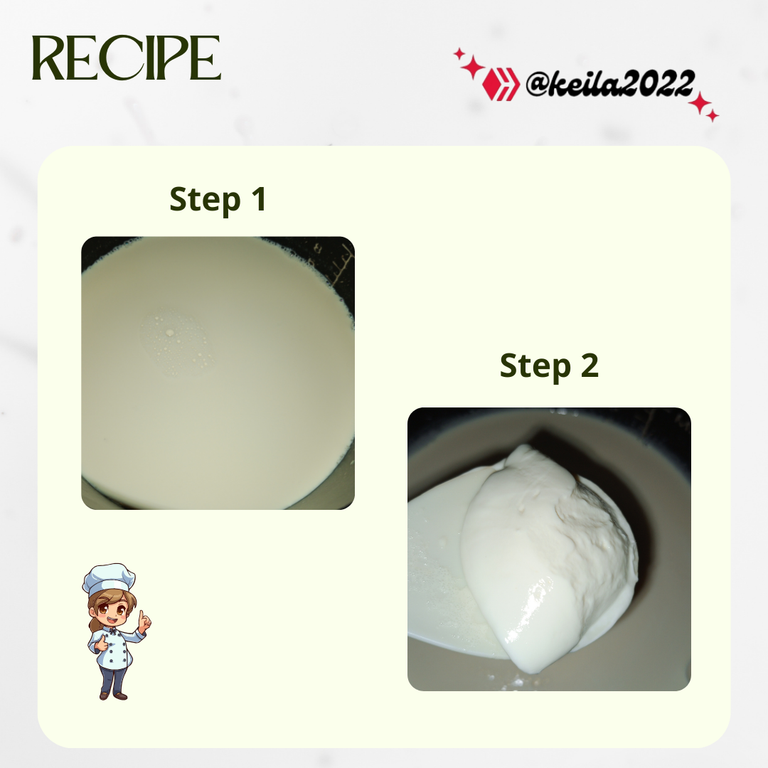
Paso 1.
Colocamos la leche en la olla eléctrica multifunción en la opción freír para dejar sin tapa y dejamos que caliente suficiente, pero sin dejar hervir. Dejamos reposar por unos minutos para que baje la temperatura.
Paso 2.
Colocamos la base del yogurt en la leche y revolvemos muy bien.
Colocamos la tapa y seleccionamos la opción Yogurt, allí permanecerá por 8 horas.

Nota importante: En caso de no poseer olla multifunción, la mezcla se coloca en un envase no metálico con tapa, cubrimos con una tela oscura y lo reservamos en un lugar oscuro y cálido (el horno es una buena opción).
Haciendo este procedimiento lo dejaremos por 12 horas o 15 horas.
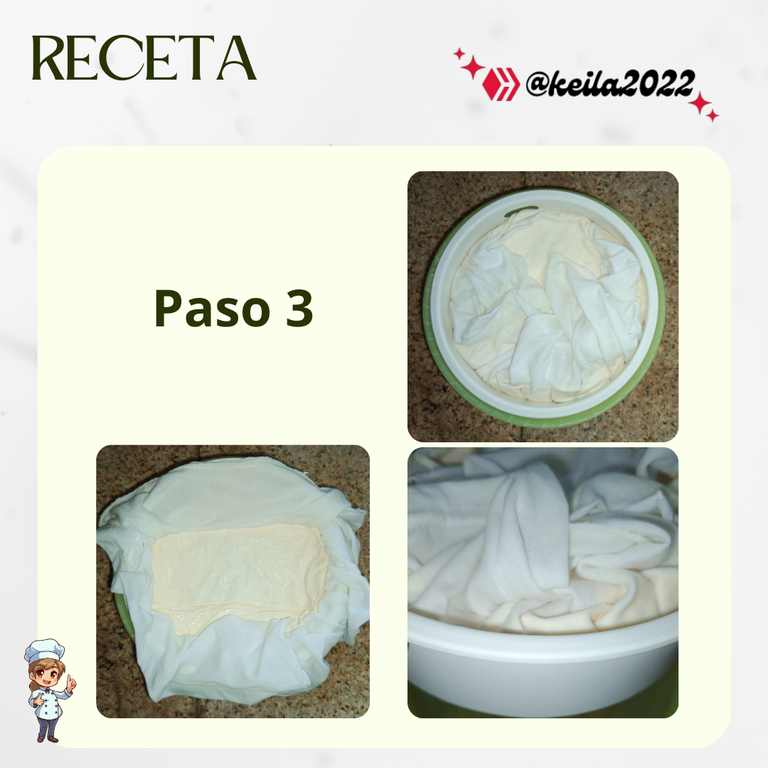
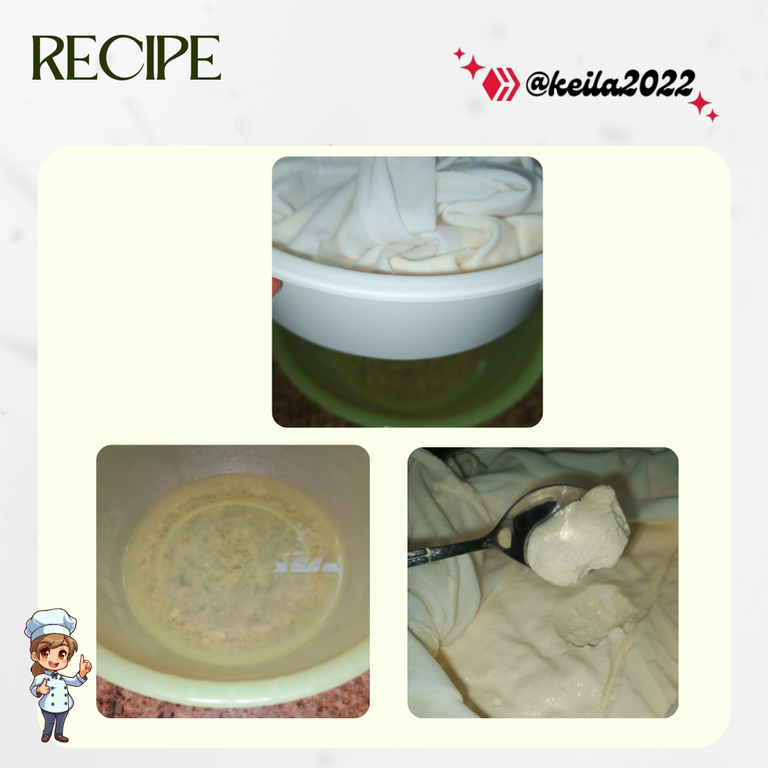
Paso 3.
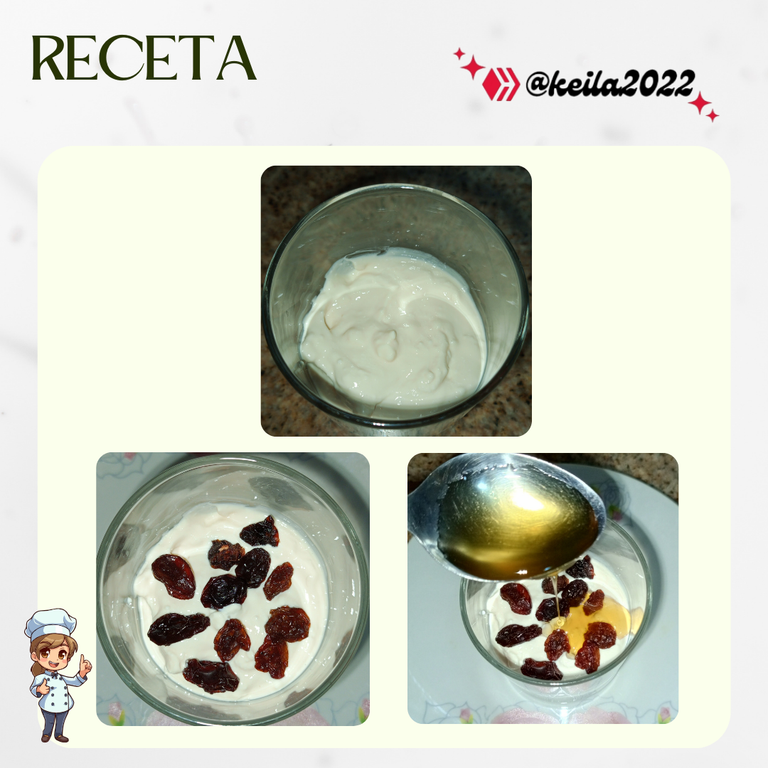
Una vez transcurrido el tiempo, procedemos a filtrar el líquido del yogurt. Colocamos la taza, luego el colador y encima la tela, en esta colocamos el yogurt, cubrimos con la tela restante a los lados y llevamos a la nevera.
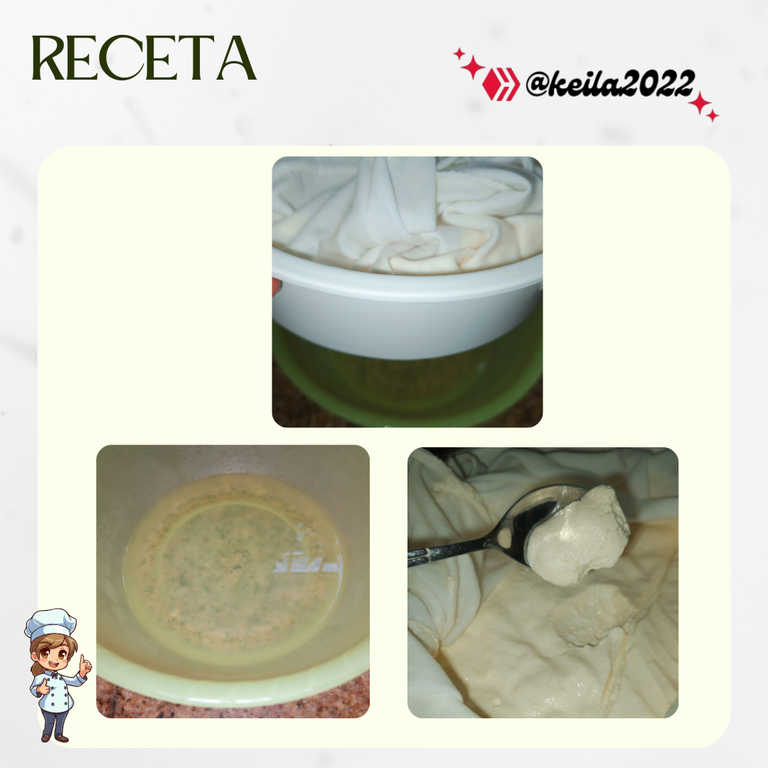
Siempre preparo el yogurt en el día y lo dejo escurrir toda la noche, sin embargo, considero que 4 horas en la nevera es suficiente, pero si lo quieres más denso y cremoso puedes dejarlo por más tiempo.
La idea es que se filtre el agua y el yogurt quede firme y con una mejor consistencia.
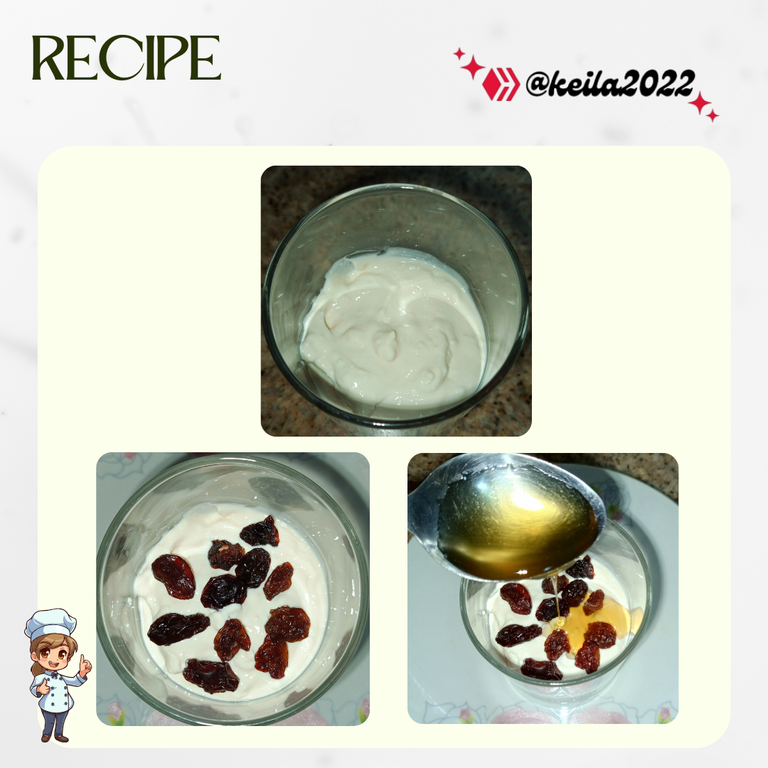
Y listo, lo podemos envasar y servir.
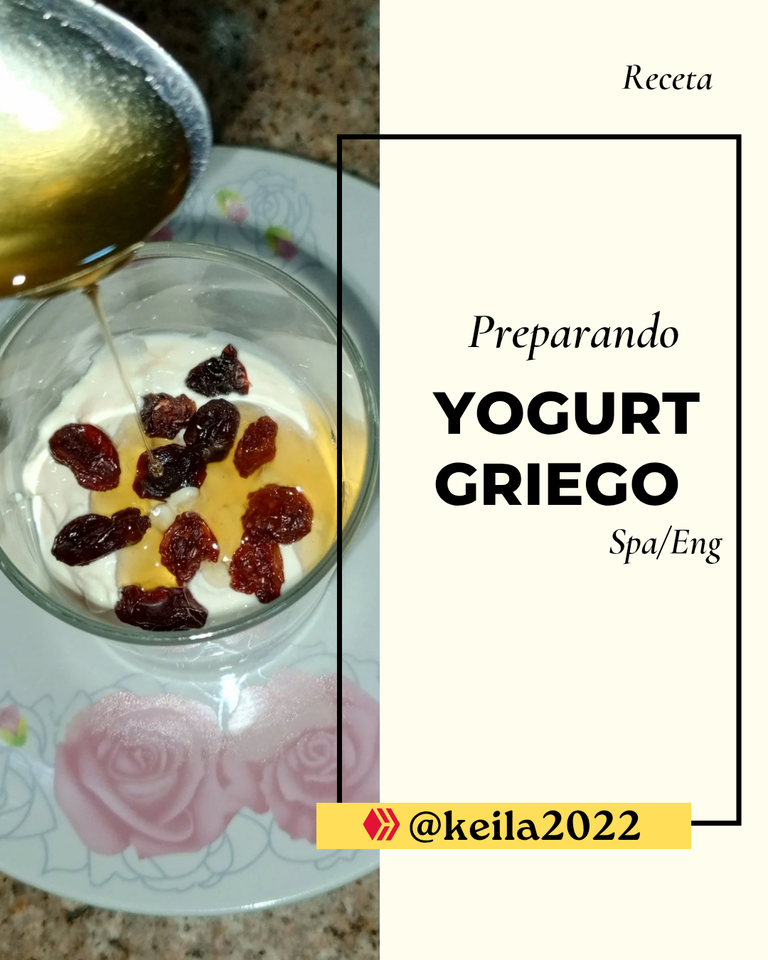
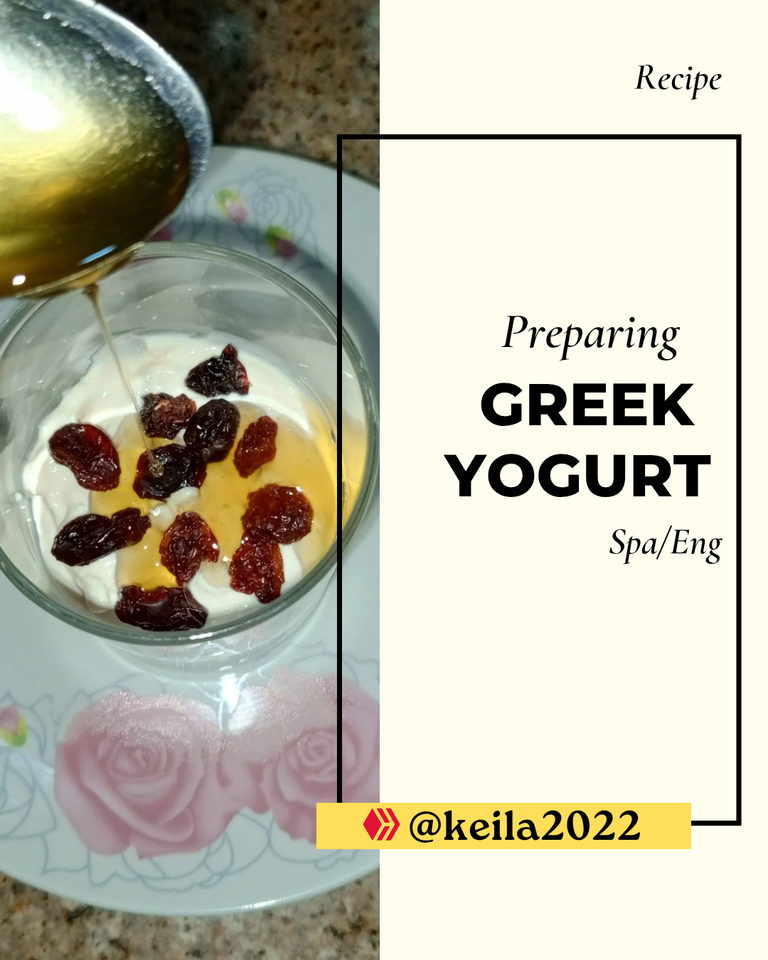
En esta oportunidad le añadí pasas, miel y quedó exquisito, nada que envidiarle al yogurt procesado y es estupendo para las meriendas, fácil de acompañar y sobre todo saludable.
Al hacerlo de esta manera, obviamente se reduce la cantidad, en ocasiones hago sólo la mitad como Yogurt Griego y la otra parte la dejo para mezclarla con dulce de frutas y así obtengo un delicioso yogurt líquido.
¿Que te ha parecido la receta?
Super fácil, verdad!
Si te animas a prepararla me cuentas.
Si tienes sugerencias te leo en los comentarios.
Gracias a quienes llegan al final del Post.
Para mí siempre es grato compartir con todos.
Cómo siempre, te abrazo en la distancia.
English VersionDiseño de Imágenes: Canva
Traductor utilizado: DeepL.com
Preparing Greek Yogurt
Greetings to all the members of this wonderful community, where smells and flavors become words and vice versa, where knowledge merges with the taste for good food and our kitchen becomes the center of our creativity and imagination.
I am very happy to share this recipe for Greek Yogurt, not only to show the step by step (extremely simple), but also to motivate people who have not dared to prepare it because the same thing may be happening to them as it did to me, I did not try it because I was not sincere about the recipe and did not have the confidence to get good results.
So, without further ado, as always, hands to the kitchen:
Ingredients:
150g natural firm yogurt.
2 liters of pasteurized milk.
Implements.
A piece of cloth (sterilized with hot water).
A medium cup.
A large strainer or filter.
Procedure:
Step 1.
Place the milk in the multifunction electric pot in the fry option to leave without lid and let it heat enough, but do not let it boil. Let stand for a few minutes to lower the temperature.
Step 2.
Place the yogurt base in the milk and stir well.
Place the lid and select the Yogurt option, it will remain there for 8 hours.
Important note: If you do not have a multifunctional pot, place the mixture in a non-metallic container with a lid, cover it with a dark cloth and keep it in a dark and warm place (the oven is a good option).
Doing this procedure we will leave it for 12 hours or 15 hours.
Step 3.
Once the time has elapsed, we will proceed to filter the yogurt liquid. We will place the cup, then the strainer and on top of the cloth, in this we will place the yogurt, cover with the remaining cloth on the sides and take it to the refrigerator.

I always prepare the yogurt on the day and let it drain overnight, however, I consider that 4 hours in the refrigerator is enough, but if you want it more dense and creamy you can leave it for longer.
The idea is that the water filters out and the yogurt becomes firm and with a better consistency.
And ready, we can pack it and serve it.
This time I added raisins, honey and it was exquisite, nothing to envy to processed yogurt and it is great for snacks, easy to accompany and above all healthy.
By doing it this way, obviously the amount is reduced, sometimes I make only half as Greek Yogurt and the other part I leave it to mix with fruit candy and so I get a delicious liquid yogurt.
What did you think of the recipe?
Super easy, right!
If you dare to prepare it, let me know.
If you have any suggestions, I'll read them in the comments.
Thanks to those who make it to the end of the Post.
It is always a pleasure for me to share with everyone.
As always, I hug you in the distance.
Image design: Canva
Translator: DeepL.com