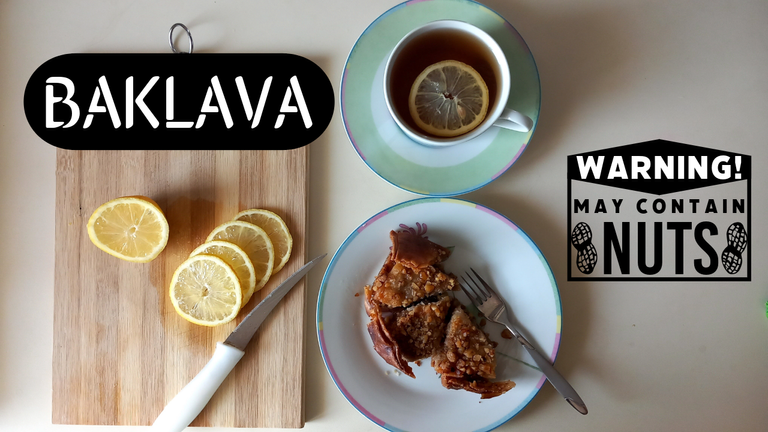
Hello everyone!!!
Today we will make baklava with you again, but this time not Azerbaijani Baklava, but authentic Turkish Baklava.
A short while ago, I shared with you in a post that we made Azerbaijani Baklava for Navruz. Now, my mum and aunt were looking for an easier dessert because they were tired. For this, the most suitable one is Turkish Baklava for sure.
You do not need to roll out one by one like the other, you can roll out the layers in 10 layers. Can it get any easier than this? Imagine, instead of opening 50 layers one by one, you are done after 5-6 layers in total. I am sure it will be much easier for someone who is used to difficult.
Enough of this talk, let's start the recipe!

Ingredients for the dough;
- 100 grams of softened butter or margarine at room temperature
- One egg
- Half tea glass (50 millilitres) oil
- Half tea glass (50 millilitres) milk
- One tea glass (100 millilitres) water
- Two tablespoons of yoghurt
- Two tablespoons of vinegar
- A flick (3-4 grams) of salt
- Approximately 600 grams of flour
When adding the flour, we should add it gradually, and this amount of flour may vary according to the quality of the flour.
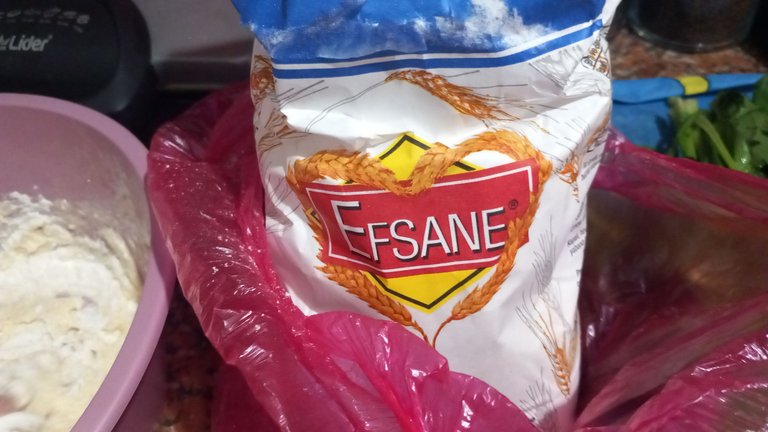
As I mentioned above, since the amount of flour you use may vary according to the quality of flour, it will be better if I tell you which brand of flour we use.
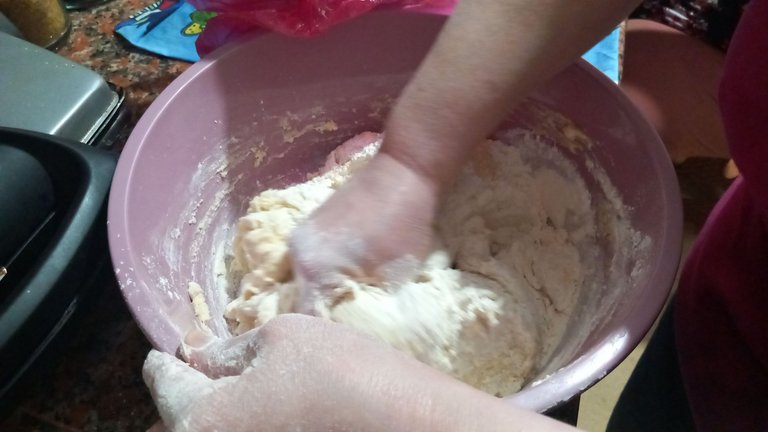
Dough Kneading;
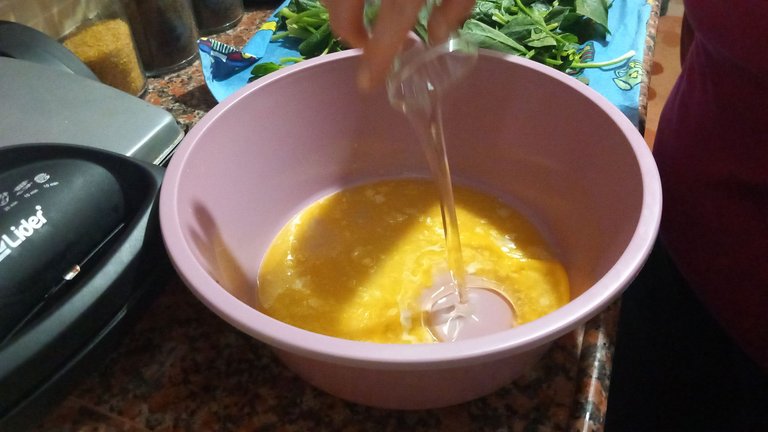
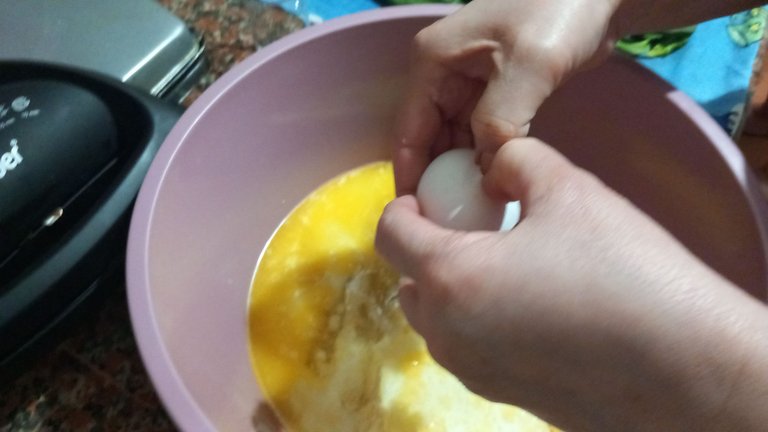
Firstly, unlike the previous recipe, we mix the liquids here.
First Stage
Mix 100 grams of almost liquid butter, a pinch of salt, one egg, 2 tablespoons of vinegar and yoghurt, 50 millilitres of vegetable oil and 100 millilitres of water with milk in a deep bowl.
Second Stage
We start to knead the dough by adding 600 grams of flour in a controlled manner, if it is not enough, it can be more. When it reaches the consistency of an earlobe, we kneaded it for 3 or 4 minutes.
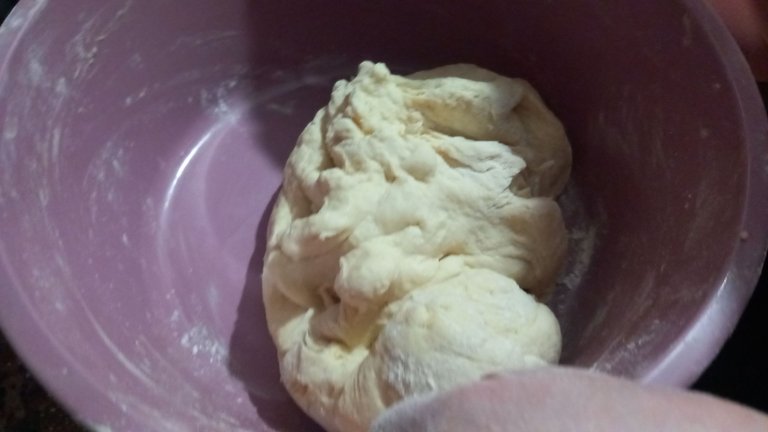
It will be great if it waits in the fridge overnight, but if there is not enough time for this, it needs to rest in the fridge for at least 2 hours.
Filling Ingredients;
Actually, you don't need a lot of ingredients for the filling of baklava. You can use walnuts or hazelnuts according to your taste. You can also adjust the density depending on your taste.
My mother used about half a kilogram of walnuts for 1 tray, but because she wanted it to be dense. Normally, it will be enough to use 300 grams of walnuts.
Rolling out the dough;
We roll out the dough into 9 pieces and roll them. We have 9 pieces of meringue with the word used by my mother. We open these meringues with a diameter of 10 centimetres with the help of starch. After this process, we put a refrigerator bag between them, our aim is to prevent them from sticking, we put them back in the refrigerator for 2 hours.
Starch can be corn or wheat starch, but my humble advice is to use wheat starch when rolling out dough for desserts, it will be more delicious and crispy.
After this process, we roll out these rolled out doughs as thinly as we can, trying to be very fast. It will be much bigger than your tray, do not worry, after cutting the excess, we will put these excesses on the same layer.
It is also necessary to apply a little melted butter on the dough after each layer of dough. Let's not forget that almost every process we do is for the baklava to be crispy. Just like vinegar.
Also, we used a 40 centimetre tray, which is quite big. We even had a little problem with this, but I will talk about it a little later.
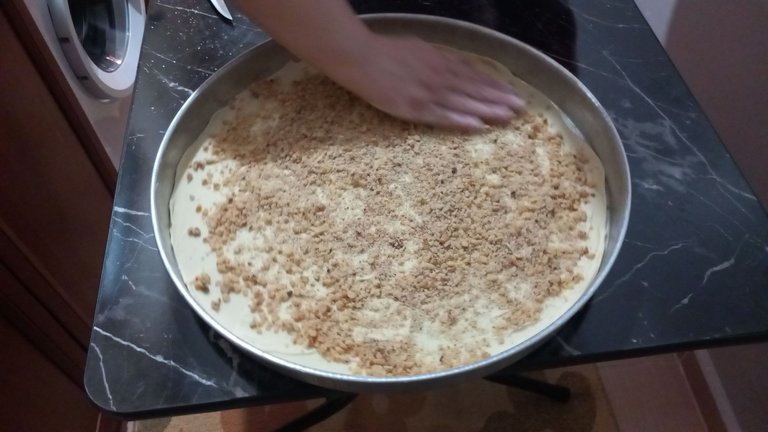
After spreading the oil, add walnuts or hazelnuts to each layer. Of course, these should be passed through a food processor so that they are not whole but toothsome.
You should not use filling for the last 2 layers. If you use it, those walnuts or hazelnuts will come out or traces will be visible while cooking. We continue to drizzle the oil.
Shaping;
After rolling out the top layer (you should not sprinkle with oil), go through the edges with a knife so that it does not stick and the walnut stays inside. Also the corners should have a sweet hardness.
Now, since I don't know how to explain this cut, I made a small video. I'm sure friends who understand the conversations in between will surely laugh somewhere 😂
Cooking;
Now it is time for our accident. We went to my aunt's house in Istanbul for this baklava and we realised that her oven was not as big as our trays. Therefore, we asked the bakery in the neighbourhood to bake the baklava. Thank God they accepted.
The only problem with this was that ours was a bit darker than my aunt's because it was overcooked.
Of course, before sending it to the oven, it is necessary to pour 250 grams of melted butter over it. You can also add 1 tea glass, ie 100 millilitres of vegetable oil. But remember that it may smell.
If there was an oven, how would we cook it?
We bake it in a preheated oven at 180 degrees for about 20-30 minutes. When the top turns a nice light golden colour, we take it out and let it cool.
Since the colder the baked baklava is, the better it will be, we started to make the syrup about 2 hours later.
Preparation of Sherbet;
- 800 grams (4.5 cups) granulated sugar
- 1.1 (5.5 cups) litres of water
- Quarter lemon
After putting the ingredients in a pot, we start boiling. Since the sugar is already melting on its own, we definitely do not mix until the bubbles start to appear.
After the bubbles start to appear, we mix a little and pour a ladle full of sherbet into the air. After the ladle is empty, if the syrup starts to flow drop by drop, the syrup is ready. If it does not flow, it will be good to boil a little more and check this way.
Last Step;
After removing the cold baklava from the stove, we pour the sherbet we have brought without letting it cool by distributing it. Thus, the baklava will be more crispy and delicious.
After pouring the sherbet, we leave the tray on a flat place to absorb a little bit. It will be better if it waits overnight, but the baklava will come to its own in the range of 2-3 hours and bon appetit!
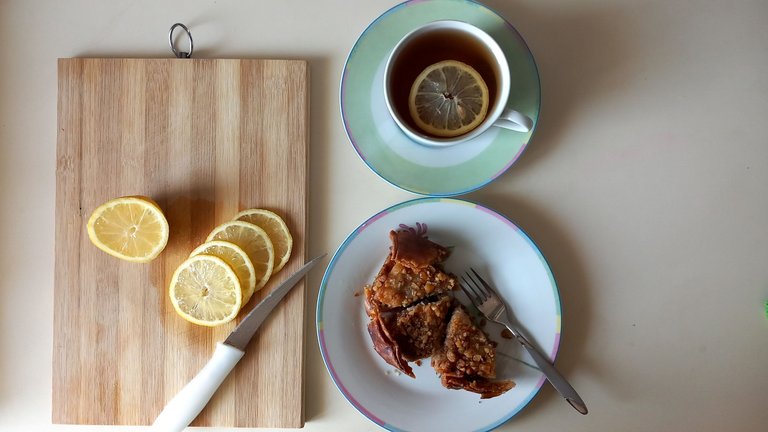
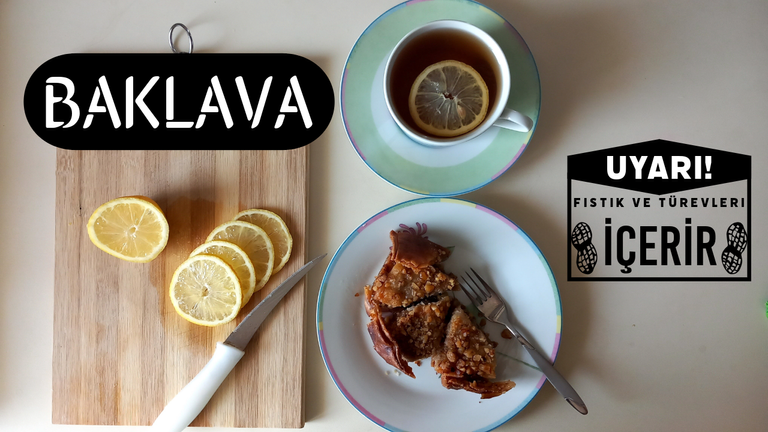
I like baklava more with black tea with lemon. I can say it's exactly sweet and sour harmony. Oh, well.
Thank you for being with me this far. I hope you will try it one day. If you try it, be sure to write to me, okay? Either as a comment on this post or as a DM.
See you later.
Take care of yourself, stay with health and love and please remember that;
You are the only one of you.

Herkese merhabaa!!
Bugün sizinle tekrar baklava yapacağız ama bu sefer Azeri Baklavası değil de has ve has Türk Baklavası.
Kısa bir süre önce Navruz için Azeri Baklavası yaptığımızı bir postumda sizinle paylaşmıştım. Şimdi ise annem ve teyzem yorulduklarından dolayı daha kolay bir tatlı aradılar. Bunun için ise en uygun olanı Türk Baklavası'dır emin olun.
Diğeri gibi teker teker açmanıza gerek kalmadan katlarını 10'lu bir şekilde açabiliyorsunuz. Bundan daha kolayı olur mu? Düşünsenize, 50 katı teker teker açmak yerine toplamda 5-6 kat sonrasında işiniz bitiyor. Zora alışmış biri için eminim çok daha kolay olacaktır.
Bu kadar laf salatası yeter hadi tarife başlayalım!
Hamur için malzemeler;
- 100 gram oda sıcaklığında yumuşatılmış tereyağı veya margarin
- Bir adet yumurta
- Yarım çay bardağı (50 mililitre) sıvı yağ
- Yarım çay bardağı (50 mililitre) süt
- Bir çay bardağı (100 mililitre) su
- İki yemek kaşığı yoğurt
- İki yemek kaşığı sirke
- Bir fiske (3-4 gram) tuz
- Yaklaşık 600 gram un
Unu eklerken yavaş yavaş eklemeliyiz ki bu un miktarı unun kalitesine göre değişebilmektedir.
Yukarıda bahsettiğim gibi un kalitesine göre kullandığınız un miktarı değişebileceğinden hangi marka unu kullandığımızı söylesem daha iyi olacak.
Hamur Yoğurması;
İlk önce diğer tariften farklı olarak burada sıvıları karıştırıyoruz.
Birinci Aşama
Neredeyse sıvı kıvamdaki 100 gram katı yağını, bir fiske tuzu, bir adet yumurtayı, 2 yemek kaşığı sirke ve yoğurdu, 50 mililitre sıvı yağı ve sütle birlikte 100 mililitre suyu derin bir kap içerisinde iyice karıştırıyoruz.
İkinci Aşama
Kontrollü bir şekilde 600 gram unu ekleyerek, yetmezse daha fazla da olabilir, hamuru yoğurmaya başlıyoruz. Kulak memesi kıvamına geldiğinde 3 ya da 4 dakika kadar yoğurmuş olduk.
Bir gece buzdolabında beklerse harika olur fakat bunun için yeterince zaman yoksa en az 2 saat kadar buzdolabında dinlenmesi gerekiyor.
İç Malzemesi;
Aslında baklavanın içi için çok malzemeye ihtiyacınız yok. Damak tadınıza göre ceviz veya fındık kullanabilirsiniz. Yine damak tadınıza bağlı olarak da yoğunluğu ayarlayabilirsiniz.
Annem 1 tepsi için yaklaşık yarım kilo ceviz kullandı fakat yoğun olmasını istediği için. Normalde 300 gram ceviz için kullanmak yeterli olacaktır.
Hamuru Açmak;
Açtığımız hamuru 9 parçaya alıp yuvarlıyoruz. Elimizde annemin kullandığı kelime ile 9 beze oluyor. Bu bezeleri nişasta yardımı ile 10 santimetre çapında açıyoruz. Bu işlemden sonra araya buzdolabı poşeti koyarak, amacımız yapışmalarını önlemek, buzdolabına 2 saatliğine geri koyuyoruz.
Nişasta, mısır veya buğday nişastası olabilir fakat nacizane tavsiyem tatlılarda hamur açarken buğday nişastası kullanmanız daha lezzetli ve çıtır olacaktır.
Bu işlemden sonra bu açılan hamurları çok hızlı olmaya çalışarak olabildiğince ince bir şekilde açabildiğimiz kadar açıyoruz. Tepsinizden çok daha büyük olacaktır merak etmeyin fazlalığı kestikten sonra aynı katın üzerine koyacağız bu fazlalıkları.
Bir de her hamur katından sonra hamurun üzerine çok az eritilmiş yağ sürmek gerekiyor. Neredeyse yaptığımız her işlem baklavanın çıtır olması için unutmayalım. Aynı sirke gibi.
Ayrıca biz 40 santimetrelik tepsi kullandık. Bayağı büyük anlayacağınız. Hatta bununla ilgili minik bir sorun yaşadık fakat bundan birazdan bahsedeceğim.
Yağı serptikten sonra da her kata ceviz ya da fındığı eklemek gerekiyor. Tabii bunlar bütün bütün değil dişe gelecek şekilde mutfak robotundan geçirilmiş olması gerekiyor.
Son 2 katına iç malzeme kullanmamak gerekiyor. Eğer kullanırsanız pişerken o ceviz veya fındık dışarı çıkacak veya izi görünecektir. Yağı gezdirmeye devam ediyoruz.
Şekillendirme;
En üst katı da açıp koyduktan sonra (yağ serpmemelisiniz) kenar kısımlarından bıçakla geçin ki yapışmasın ve ceviz içerine kalsın. Ayrıca köşeler tatlı bir sertliğe sahip olsun.
Şimdi bu kesimi nasıl anlatacağımı bilmediğimden dolayı minik bir video çektim. Aradaki konuşmaları anlayan arkadaşlar eminim bir yerde mutlaka gülecektir 😂
Pişirme;
Şimdi sıra geldi bizim kazamıza. Bu baklava için teyzemin evine İstanbul'a gitmiştik ve gördük ki teyzemin fırını bizim tepsiler kadar büyük değilmiş. Bu yüzden de çevredeki ekmek fırınında rica ettik baklavaları pişirmesi için. Sağ olsun kabul ettiler.
Bununla ilgili tek sıkıntı bizimkinin teyzeminkine göre biraz fazla piştiğinden dolayı daha kararmış olması.
Tabii fırına göndermeden önce 250 gram eritilmiş katı yağını üzerinde gezdirerek dökmek gerekiyor. İçerisine 1 çay bardağı yani 100 mililitre sıvı yağ da ekleyebilirsiniz. Ama kokabileceğini unutmayın.
Eğer fırın olsaydı nasıl pişirecektik peki?
180 derecede önceden ısıtılmış fırında yaklaşık 20-30 dakika pişiriyoruz. Üzeri güzel bir şekilde hafif altın rengine döndüğünde çıkarıyoruz ve soğumaya bırakıyoruz.
Pişmiş baklava ne kadar soğuk olursa o kadar güzel olacağı için 2 saat kadar sonra şerbet yapmaya başladık.
Şerbetin Hazırlanışı;
800 gram (4.5 su bardağı) toz şeker
1.1 (5.5 su bardağı) litre su
Çeyrek limon
Malzemeleri bir tencereye koyduktan sonrakaynatmaya başlıyoruz. Şeker zaten kendi kendine eriğinden kesinlikle baloncuklar çıkmaya başlayana kadar karıştırmıyoruz.
Baloncuklar çıkmaya başladıktan sonra ise biraz karıştırıp bir kepçe dolusu şerbeti havaya kaldırıp döküyoruz. Kepçe boşaldıktan sonra eğer şerbet damla damla akmaya başlıyorsa şerbet hazır demektir. Eğer akmıyorsa biraz daha kaynatıp bu şekilde kontrol etmek iyi olacaktır.
Son adım;
Soğuk baklavanın üzerine ocaktan aldıktan sonra soğumaya bırakmadan getirdiğimiz şerbeti dağıtarak döküyoruz. Böylece baklava daha çıtır ve lezzetli olacak.
Şerbeti döktükten sonra biraz çekmesi için düz bir yere tepsiyi bırakıyoruz. Gece beklerse daha iyi olur fakat yine 2-3 saat aralığında baklava kendine gelmiş olur ve afiyet olsun!
Ben baklavayı daha çok limonlu siyah çayla seviyorum. Tam olarak tatlı ekşi uyumu diyebilirim. Neyse.
Buraya kadar benimle olduğunuz için teşekkür ederim. Umarım bir gün denersiniz. Denerseniz bana mutlaka yazın olur mu? İster bu posta yorum olarak isterseniz ise DM olarak.
Sonra görüşmek üzere.
Kendinize dikkat edin, sağlık ve sevgiyle kalın ve lütfen unutmayın ki;
Bu dünyada sizden başka bir tane daha yok.
Bütün fotoğraflar aksini iddia etmediğim sürece benim tarafımdan, akıllı telefonumla çekilmiştir.
All photos are taken by me, with my smart phone unless otherwise stated.
All of my content is written in Turkish first and then with the help of translators and dictionaries below translated in English.
https://www.seslisozluk.net
https://www.deepl.com/translator
P.S. If you know English AND Turkish, I do that too... If you see a translation discrepancy that was on purpose. I did think this is as proper as I could do. Because there are many differences between these languages.
Not: Hem Türkçe hem de İngilizce biliyorsanız, ben de biliyorum... Eğer çeviri farklılığı görürseniz bunun bilinçli olduğunu bilin lütfen. Bunu yapabileceğim en uygun şekilde yaptığımı düşünüyorum. Çünkü bu iki dil arasında çok fazla fark var.

