¡Bienvenidos a mi rinconcito en Hive!
Con el yogurt griego se pueden preparar infinidad de recetas tanto dulces como saladas, que además de ser deliciosas son saludables para nuestro organismo, ya que es rico en probióticos y vitaminas y como si fuera poco, el yogurt griego tiene menos lactosa debido al proceso de fermentación y filtración. Por esta razón y por una publicación de @sirenahippie donde ví lo fácil que es hacer yogurt casero, me sentí motivada a hacer mi propio Yogurt Griego Casero y porque además me sale más económico hacerlo en casa. ¿¡Qué más se puede pedir!?
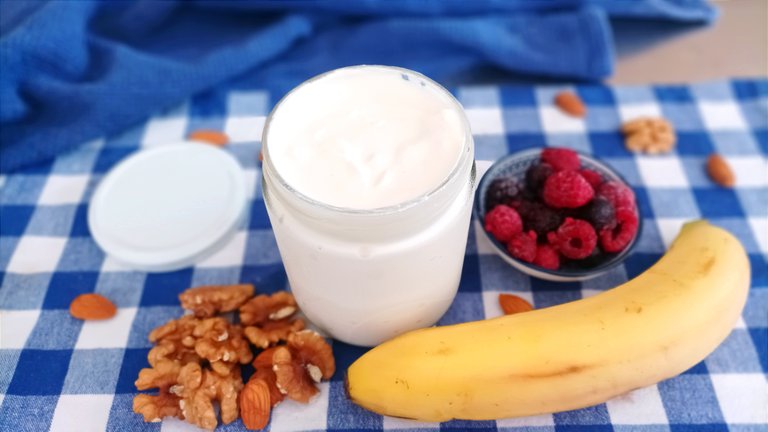
Algunas de las recetas que puedes hacer con Yogurt Griego son crema de yogurt griego con pepino o “Tzatziki” y una variante del Hummus conocido como “Musabaha”. Por cierto, hice un par de publicaciones con el paso a paso de estas recetas. Solo debes hacer click en el enlace para verlas. Retomando el tema, con este producto, también, puedes hacer bebidas como por ejemplo el smoothie que es extremadamente delicioso y refrescante. Igualmente, podemos hacer tortas y postres como el yogurt griego con mermelada y frutos secos que es uno de mis favoritos.
Como pueden ver, motivos sobran para hacer Yogurt Griego en casa y seguro todo el dinerito que te puedes ahorrar y además es sumamente fácil de hacer. Lo que si vas a necesitar es un poco de paciencia. Sin más dilación, te mostraré el paso a paso de cómo hacer Yogurt Griego a la Zu.
Vas a necesitar los siguientes ingredientes:
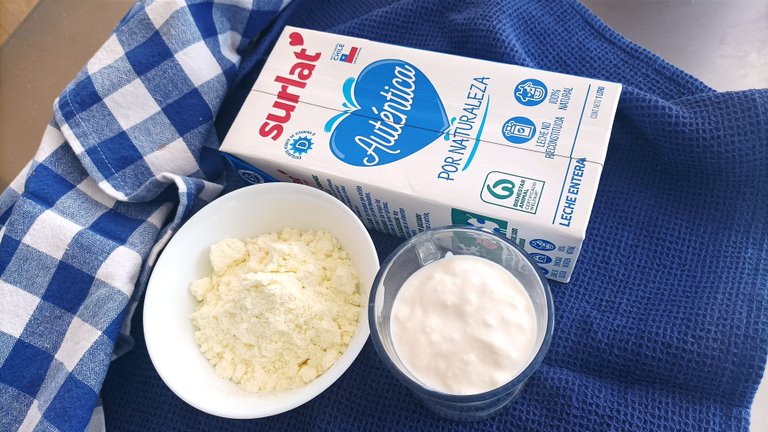
• 1 lt de leche líquida.
• 125 gr de yogurt natural.
• 60 gr de leche en polvo.
Adicional:

• Termómetro.
• Un envase, preferiblemente si es refractario.
• Un filtro de tela o un paño para este propósito.
• Agua caliente.
• Un colador.
• Bandeja.
• Un paño grande o una toalla.
Preparación:
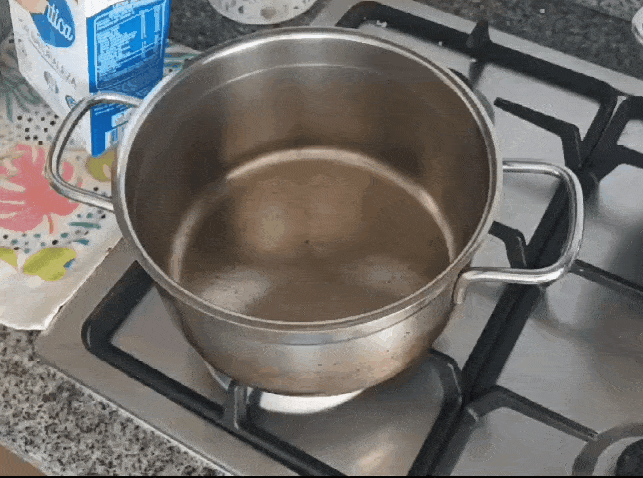
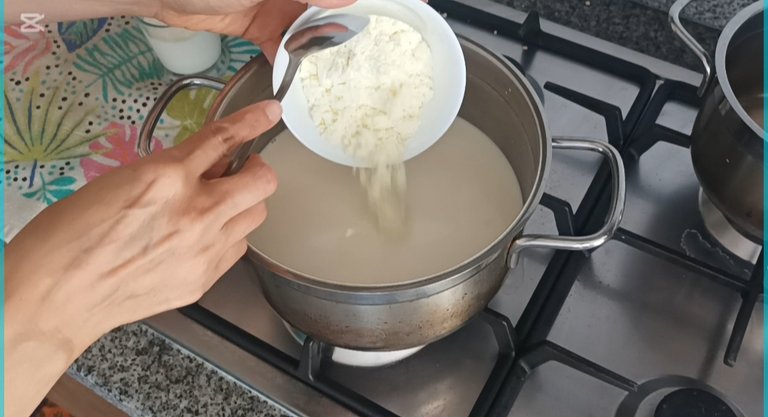
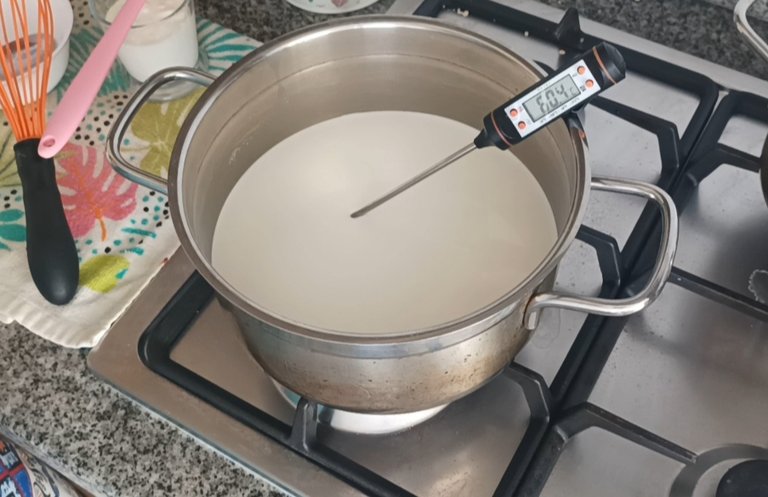
Agregar en una olla la leche líquida y la leche en polvo. La leche en polvo también la puedes agregar después que la leche líquida esté caliente. Depende del gusto de cada quien.
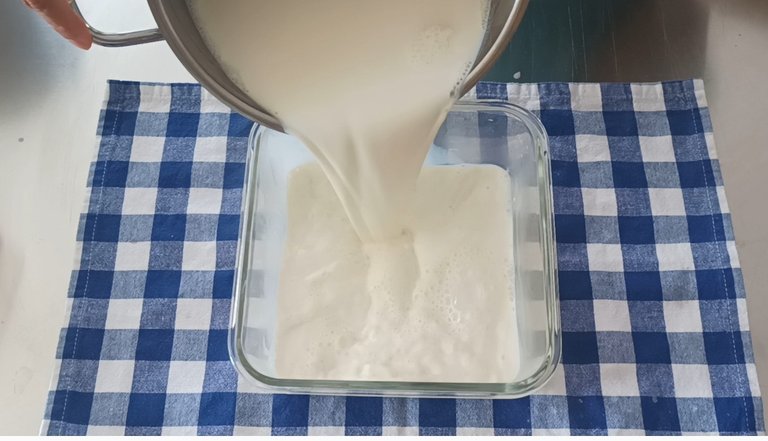
Calentar la leche, preferiblemente con un termómetro, hasta que llegue a 60 grados centígrados. Cuando el termómetro marque la temperatura adecuada de calor. Apagar el fuego y agregar el yogurt natural y mezclar para integrar. Seguidamente, pasar a un envase.


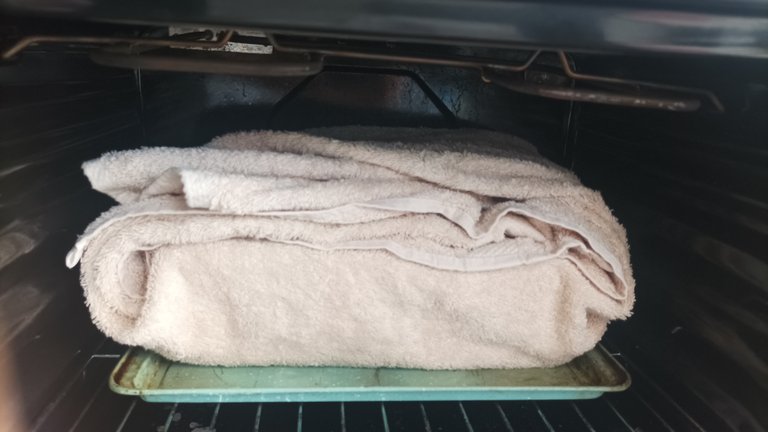
Luego, tapar muy bien. Por otro lado, colocar el paño sobre una bandeja y seguidamente, colocar el yogurt natural junto con un envase pequeño con agua caliente. De esta manera obtendrás un mejor resultado. Luego, cubrir muy bien con el paño y llevar a un lugar oscuro y bien cerrado. Yo lo puse en el horno, obviamente apagado y dejar durante 12 horas.

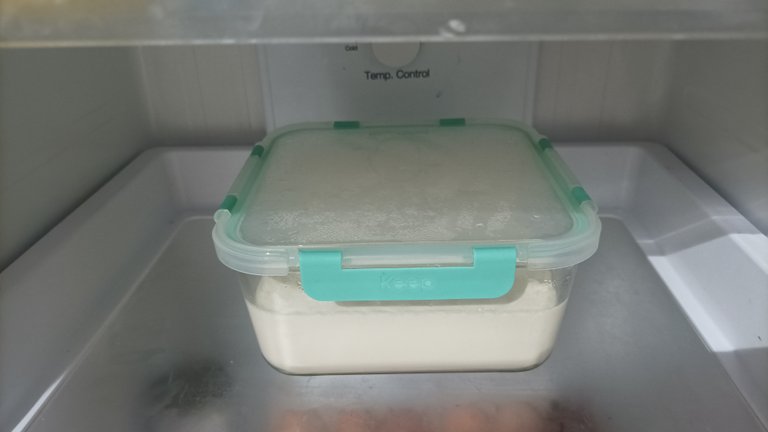
Pasado este tiempo, sacar del horno y llevar al refri durante toda la noche.
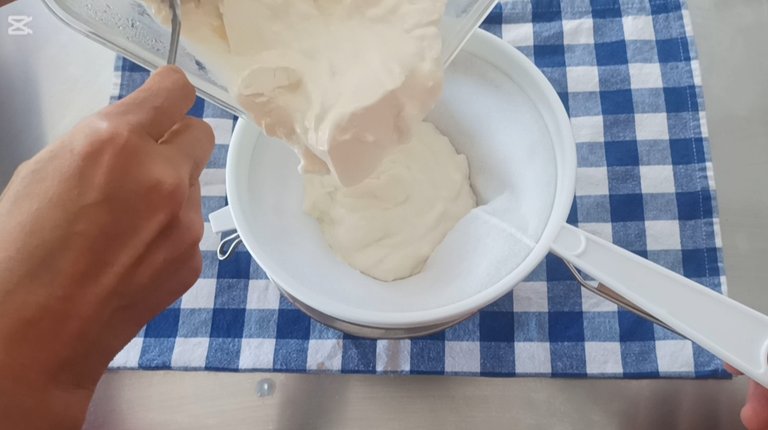
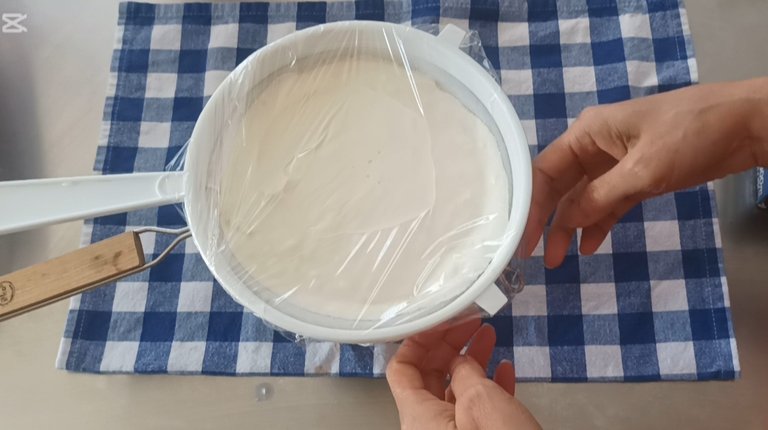
Al día siguiente, ya tendrás listo tu yogurt natural, el cual se agrega en un filtro que debes colocar sobre un colador y una ollita para que caiga todo el suero, cubrir con una papel film y dejar en el refri por unas 12 horas más.

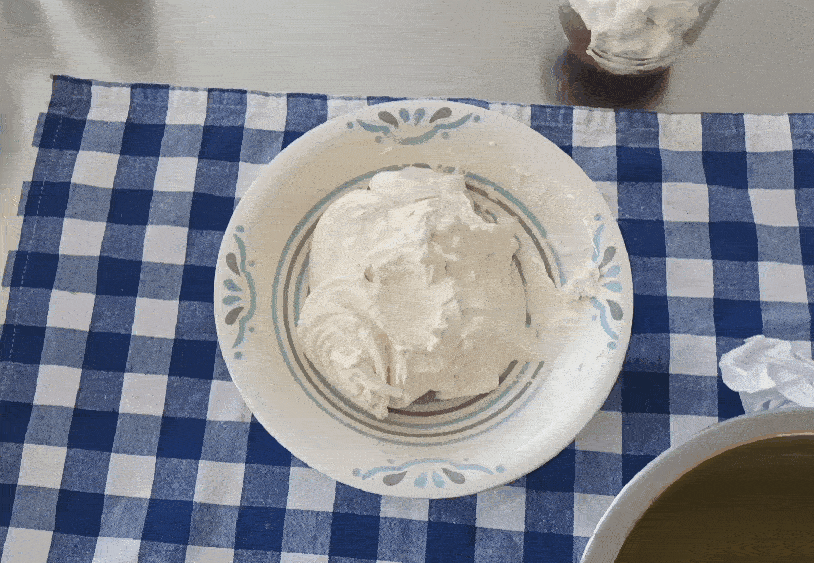
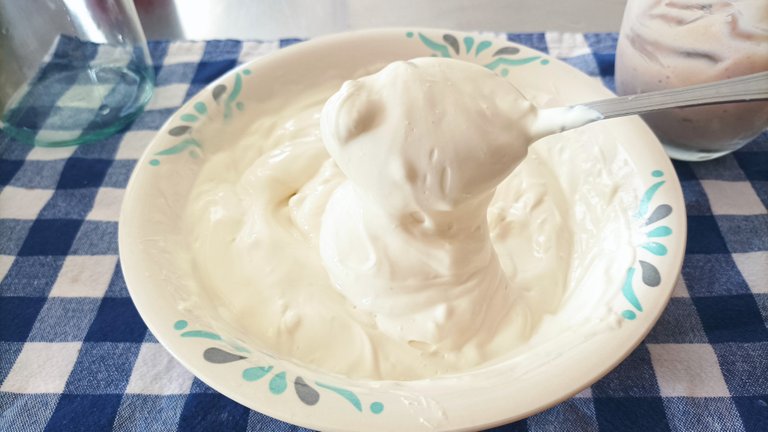
Pasadas las 12 horas, saca del refrigerador y verás que el yogurt se ha vuelto mucho más consistente y también podrás ver todo el suero que soltó. Debido a que yo lo dejé más de 12 horas, me quedó como un queso crema, por lo que le agregué el suero con una cucharilla hasta que logré la cremosidad que deseaba.


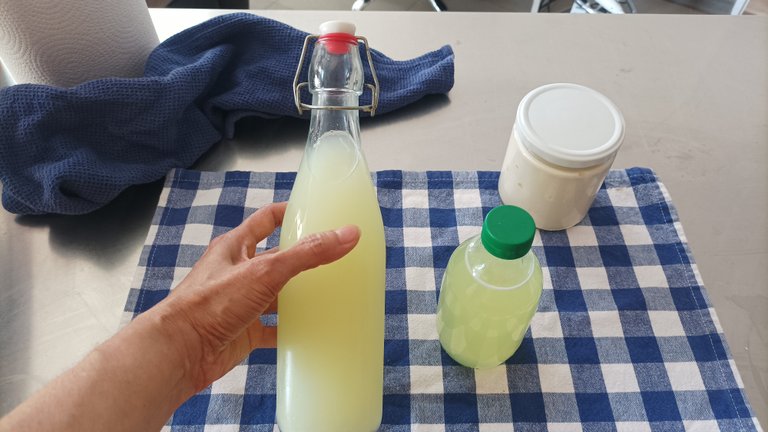
Por cierto, el suero lo guardo en una botella para luego hacer panes y tortas para nosotros en casa, bebidas fermentadas, panquecas o mis “arepitas”. Incluso, sirve para marinar carnes. Así que aquí nada se pierde, todo se aprovecha.
En el siguiente video podrán apreciar mejor, lo cremoso que quedó este maravillosoYogurt Griego Casero**.
¡Otro producto que no volveré a comprar en el supermercado!
No me queda más que invitarte a que te animes a hacer tu propio Yogurt Griego en casa y verás lo satisfactorio que será para tí y tu bolsillo.
!Gracias por ser una grata compañía en mi cocina y por el apoyo!
¡Tu amiga, Zuuu!
ENGLISH

Welcome to my little corner on Hive!
With Greek yogurt you can prepare countless recipes both sweet and savory, which besides being delicious are healthy for our body, as it is rich in probiotics and vitamins and as if that were not enough, Greek yogurt has less lactose due to the fermentation and filtration process. For this reason and because of a publication of @sirenahippie where I saw how easy it is to make homemade yogurt, I was motivated to make my own Homemade Greek Yogurt and because it is cheaper to make it at home. What more can you ask for?
Some of the recipes you can make with Greek Yogurt are Greek yogurt cream with cucumber or “Tzatziki” and a Hummus variant known as “Musabaha”. By the way, I made a couple of posts with the step-by-step of these recipes. Just click on the link to see them. Returning to the topic, with this product, you can also make drinks such as smoothie which is extremely delicious and refreshing. We can also make cakes and desserts such as Greek yogurt with jam and nuts, which is one of my favorites.
As you can see, there are plenty of reasons to make Greek Yogurt at home and for sure all the money you can save and besides it is extremely easy to make. What you will need is a little patience. Without further ado, I will show you the step by step of how to make Greek Yogurt a la Zu.
You will need the following ingredients:
• 1 lt of liquid milk.
• 125 gr of natural yogurt.
• 60 gr of powdered milk.
Additional:
• Thermometer.
• A container, preferably if it is refractory.
• A filter cloth or a cloth for this purpose.
• Hot water.
• A strainer.
• Tray.
• A large cloth or towel.
Preparation:
Add the liquid milk and powdered milk in a saucepan. You can also add the powdered milk after the liquid milk is hot. It depends on the taste of each person.
Heat the milk, preferably with a thermometer, until it reaches 60 degrees Celsius. When the thermometer marks the right temperature of heat. Turn off the heat and add the natural yogurt and mix to integrate. Then, transfer to a container.
Then cover tightly. On the other hand, place the cloth on a tray and then place the natural yogurt together with a small container with hot water. This way you will get a better result. Then, cover very well with the cloth and take it to a dark and well closed place. I put it in the oven, obviously turned off and leave it for 12 hours.
After this time, remove from the oven and place in the refrigerator overnight.
The next day, you will have your natural yogurt ready, which is added in a filter that you should place over a strainer and a pot so that all the whey falls out, cover with plastic wrap and leave in the refrigerator for about 12 hours more.
After 12 hours, take it out of the refrigerator and you will see that the yogurt has become much more consistent and you will also be able to see all the whey it released. Because I left it for more than 12 hours, it turned out like a cream cheese, so I added the whey with a spoon until I got the creaminess I wanted.
By the way, I keep the whey in a bottle to make breads and cakes for us at home, fermented drinks, pancakes or my “arepitas”. It can even be used to marinate meats. So here nothing is lost, everything is put to good use.
In the following video you can better appreciate how creamy this wonderful Homemade Greek Yogurt turned out.
Another product that I will never buy again in the supermarket!.
I can only invite you to make your own Homemade Greek Yogurt at home and you will see how satisfying it will be for you and your pocket. your pocket.
Thank you for being a pleasant company in my kitchen and for the support!
Your friend, Zuuu!

All photos and videos in this post were taken with my Xiaomi Redmi 10 cell phone.
Resources: DeepL Translator, Capcut and Gifty (Free Versions).
Copyright-free music from the Capcut folder.
Posted Using INLEO

